
| Tweet |

Custom Search
|
|

|
||
 TM 11-5895-1847-12&P
0138 00
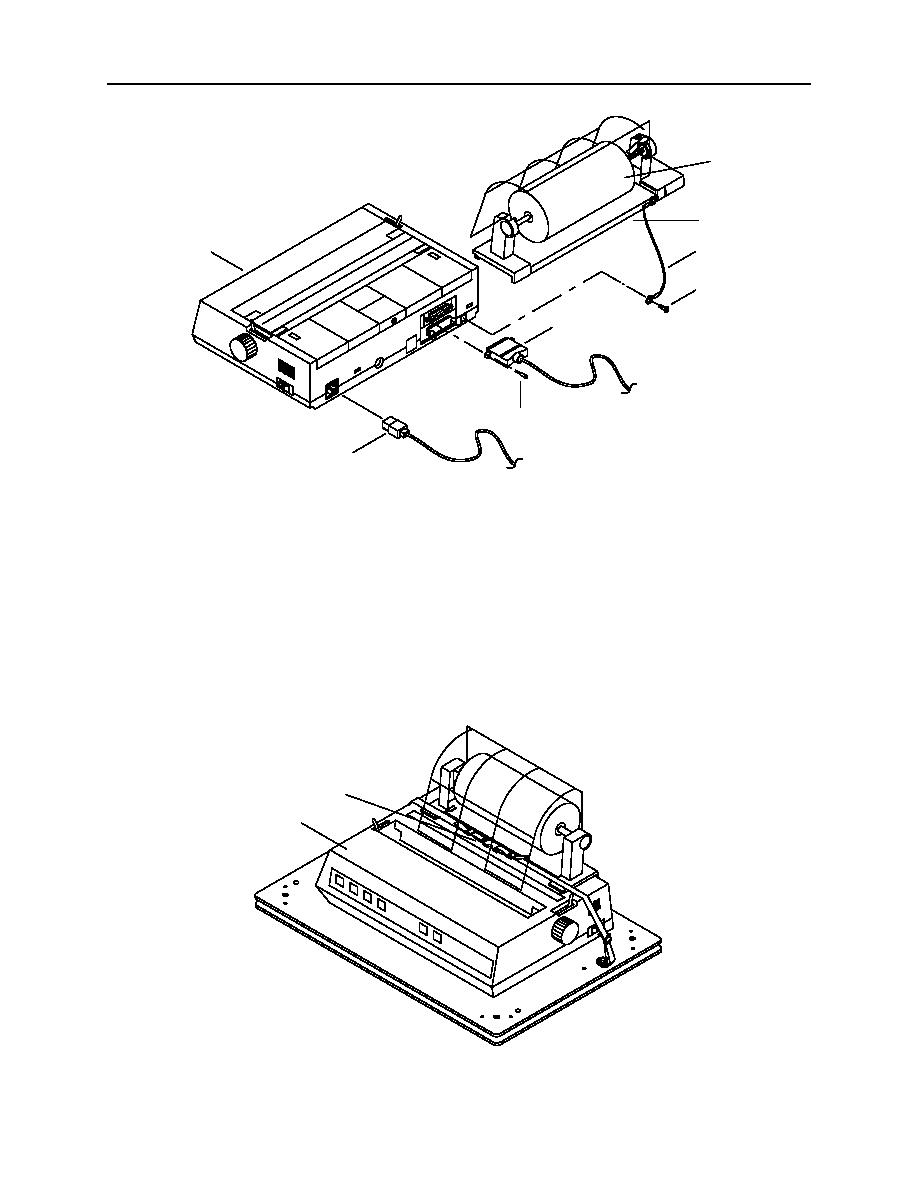
4.
Place printer (4) on plate (6) and connect power plug (12) to printer (4).
3
9
4
8
7
11
10
12
2C114-2
5.
Install 25-pin parallel port plug (11), tagged GMDSS-J2/HF PRN, to the back of the printer (4).
6.
Tighten mounting screws (10) on each side of the serial port connector shell (11).
7.
Install the paper roll (3) and paper stand (9). Place stand (9) on printer (4) and slide aft.
8.
Install screw (7) and ground wire (8) on printer (4).
9.
Position printer (4) and press down to attach printer with hook and pile tape.
10. Place strap around printer (4) and attach quick release buckle (5).
5
4
2C114-3
0138 00 3
|
||
|
||


