
| Tweet |

Custom Search
|
|

|
||
 TM 5-2010-205-14
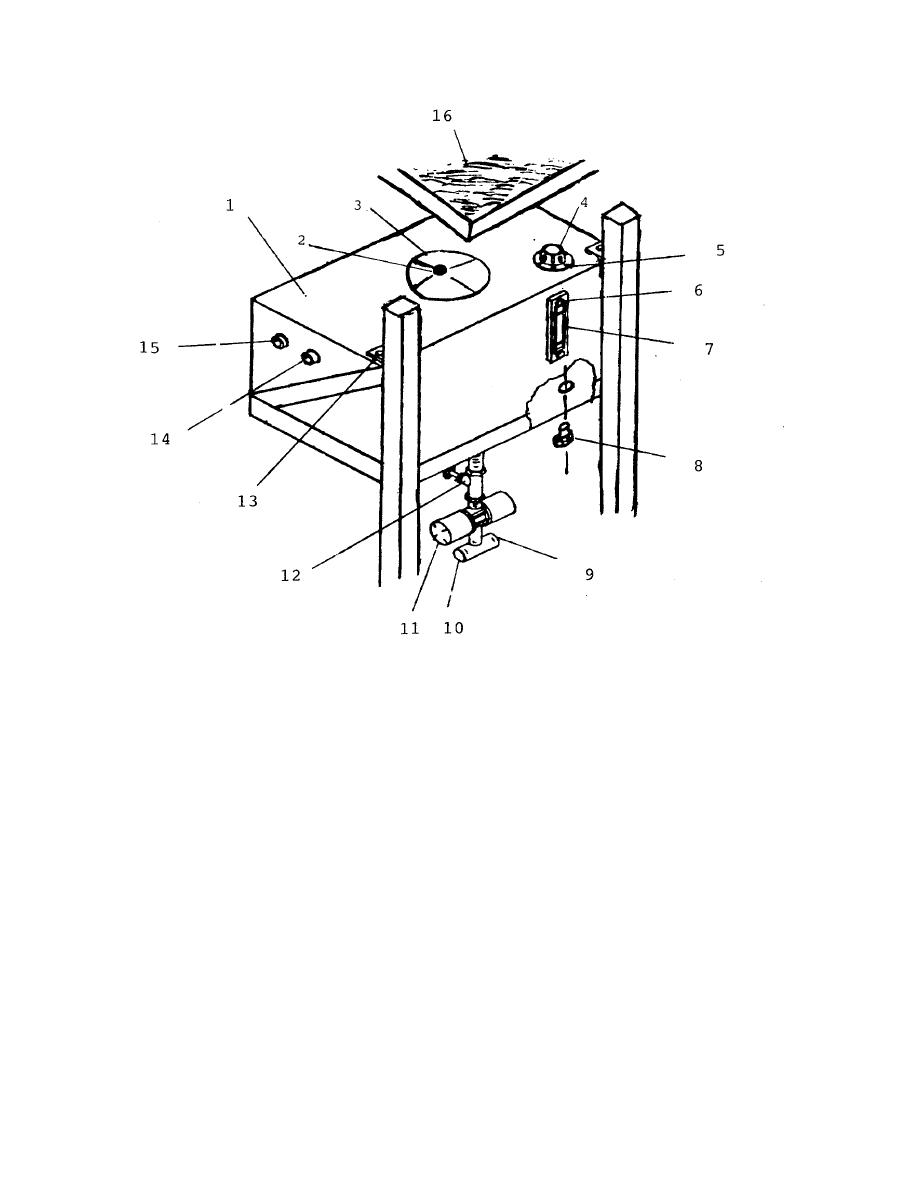
Figure 4-45. Hydraulic Reservoir Assembly
6.
Remove vent/screen assembly (4).
7.
Loosen and remove bolts (6).
8.
Remove Gauge (7).
NOTE
Cover all parts as they are removed to keep them clean.
NOTE
Be sure all parts are cleaned before installing.
NOTE
Leave new parts in their containers until ready for assembly.
9.
Install gauge (7).
4-99
|
||
|
||


