
| Tweet |

Custom Search
|
|

|
||
 TM 5-2010-205-14
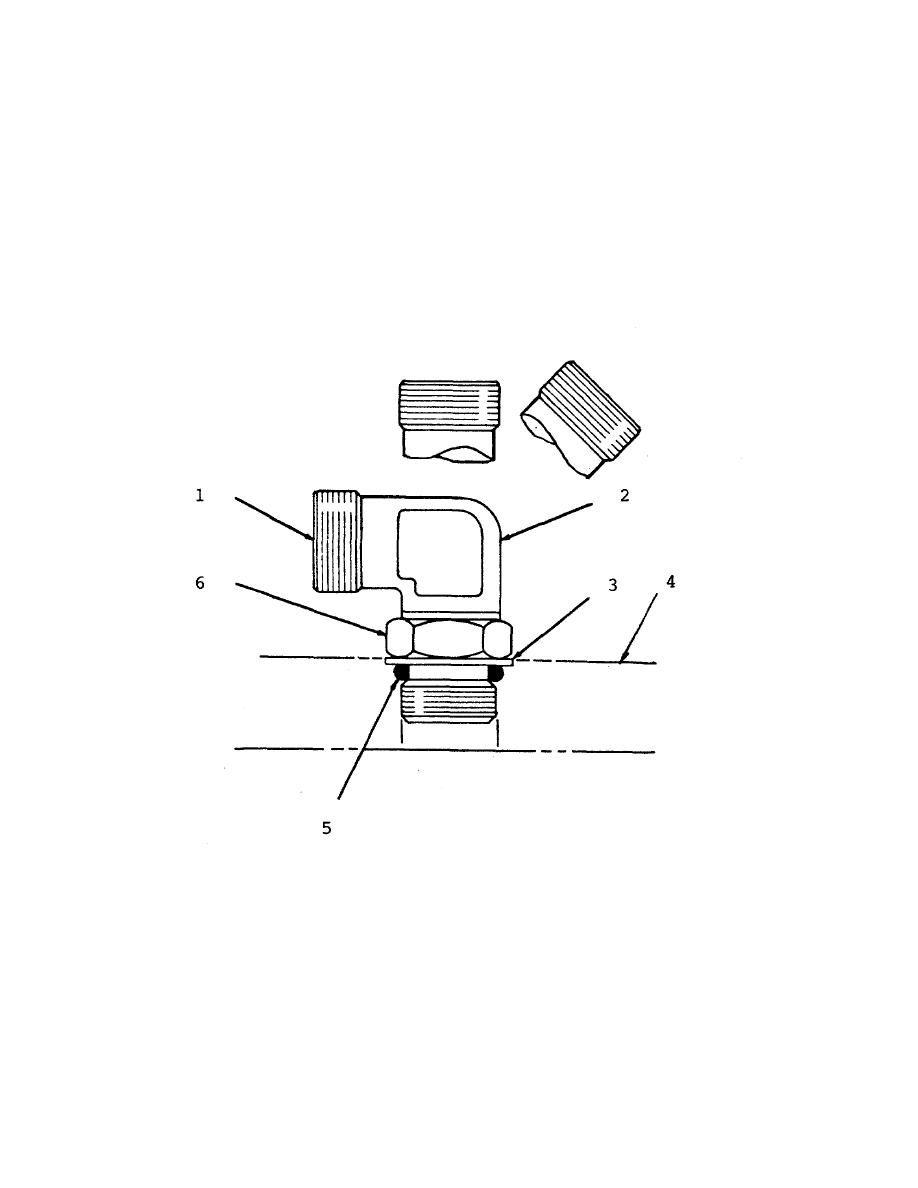
6. Loosen locknut (6).
7. Unscrew fitting (2).
8. Put locknut (6), backup washer (3), and O-ring seal (5) as far back on fitting body (2) as possible.
9. Turn fitting body (2) into position until washer (3) makes contact with part (4).
10. Rotate fitting body (2) to orientate connection (1).
11. Tighten locknut (6).
12. Make connection (1).
Figure 5-26. Hydraulic Hose and Valve Assembly
5-68
|
||
|
||


