
| Tweet |

Custom Search
|
|

|
||
 TM 5-2805-261-13
LOCATION/ITEM
ACTION
REMARKS
4-15. MANUAL STARTER DISASSEMBLY/INSPECTION/CLEANING/ASSEMBLY - continued
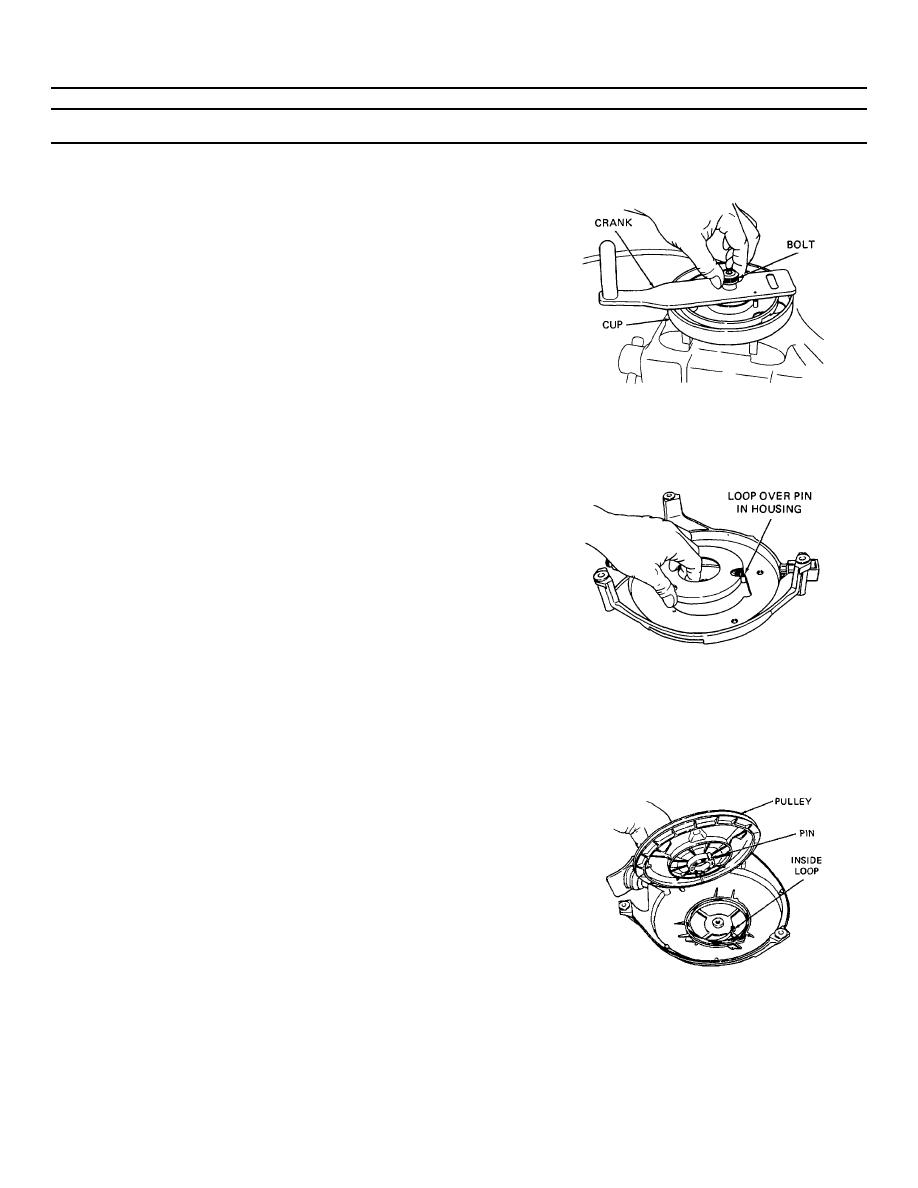
2.
Cup
Place inside spring winder
base.
3.
Spring (8)
Place spring as shown with
inside loop in cup.
4.
Crank
Place on winder engaging
crank pin in inside loop of
spring.
5.
Bolt
Install in spring winder as
shown.
6.
Crank
Wind clockwise until all of
spring except outside loop
is inside cup.
Figure 4-7. Spring winder
7.
Bolt
Remove.
8.
Crank
Lift off carefully without
dislodging spring.
9.
Cup and spring (8)
Lift out of spring winder
holding spring in place.
10. Cup and spring (8)
Place open side down over
spring opening in starter
housing. Locate outside
loop directly over pin in
housing and engage slightly
onto pin.
11. Spring (8)
Press into housing through
two openings in cup.
Figure 4-8. Spring cup
12. Cup
Remove.
13. Pulley (7)
Install in housing engaging
pin with inside loop of
spring.
Figure 4-9. Pulley and housing
4-12
|
||
|
||


