
| Tweet |

Custom Search
|
|

|
||
 TM 55-1905-217-34
(a) With the injector in the FULL FUEL position, stroke the pump operating handle (fig. 3-7) to
maintain a fuel pressure just below the valve opening (pop) pressure (para (3a) above).
(b) Pop the injector several times with the popping handle and observe the spray pattern at the
spray tip orifice. Fuel should be discharged from each orifice and the spray should produce a uniform
pattern.
(c) If the spray tip does not produce a uniform pattern, clean the orifice of the spray tip during
overhaul of the injector.
(6) Visual inspection of injector plunger.
(a) If the injector passes all the above tests (para (1) through (6) visually check the plunger
under a magnifying glass, for excessive wear or a possible chip on the bottom helix. There is a small
area on the bottom helix and lower portion of the upper helix, if chipped, that will not be indicated in any
of the tests.
(b) Remove the plunger from the injector as follows:
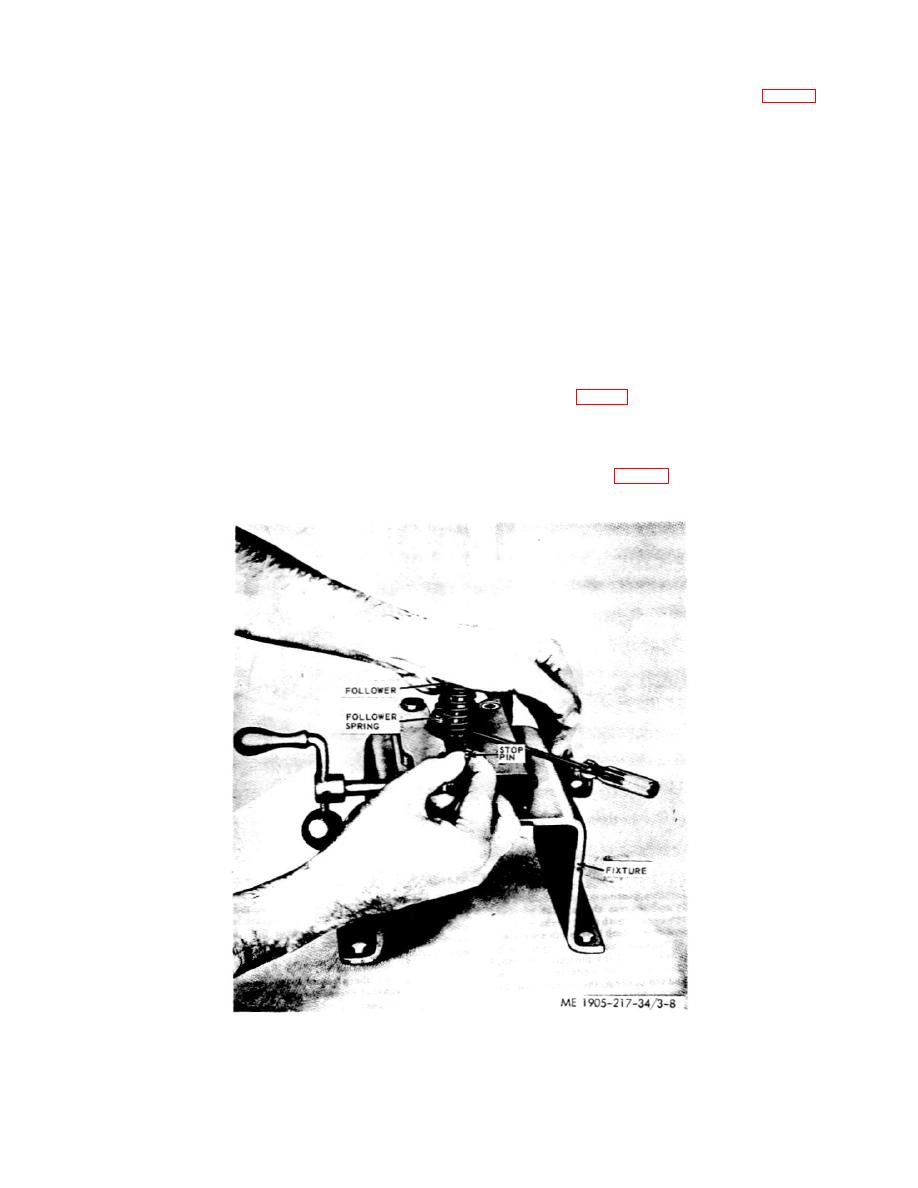
1. Position the injector in the holding fixture (fig. 3-8), right side up.
2. Compress the follower spring, then using a screw driver, raise spring above stop pin
and remove the pin. Allow the plunger spring to - raise gradually.
3. Remove the injector from the holding fixture (fig. 3-8) and turn injector up side
down, to prevent entry of dirt in injector and catch the spring and plunger in hand.
Figure 3-8. Fuel injector follower stop pin, removal.
3-10
|
||
|
||


