
| Tweet |

Custom Search
|
|

|
||
 TM 55-1905-217-34
(9) Inspect the injector plunger for scoring erosion, chipping or wear at helix. Check plunger for sharp
edges on that portion which rides in the gear. Remove sharp edges with 500 grit stone. Wash plunger after
stoning. Inspect the plunger bushing for damage. Slip plunger straight into bushing and check for free
movement. Replace defective plunger and bushing as an assembly, if either one is damaged. Injector
plungers cannot be reworked to change the output. Grinding will destroy the hardened case of the helix and will
result in seizure or scoring of the plunger.
(10) Inspect the spray tip seating surface in the injector nut for excessive nicks, burs or hard spots.
Reseat surface or replace nut.
(11) Inspect the injector valve spring for wear or damage. Replace defective spring.
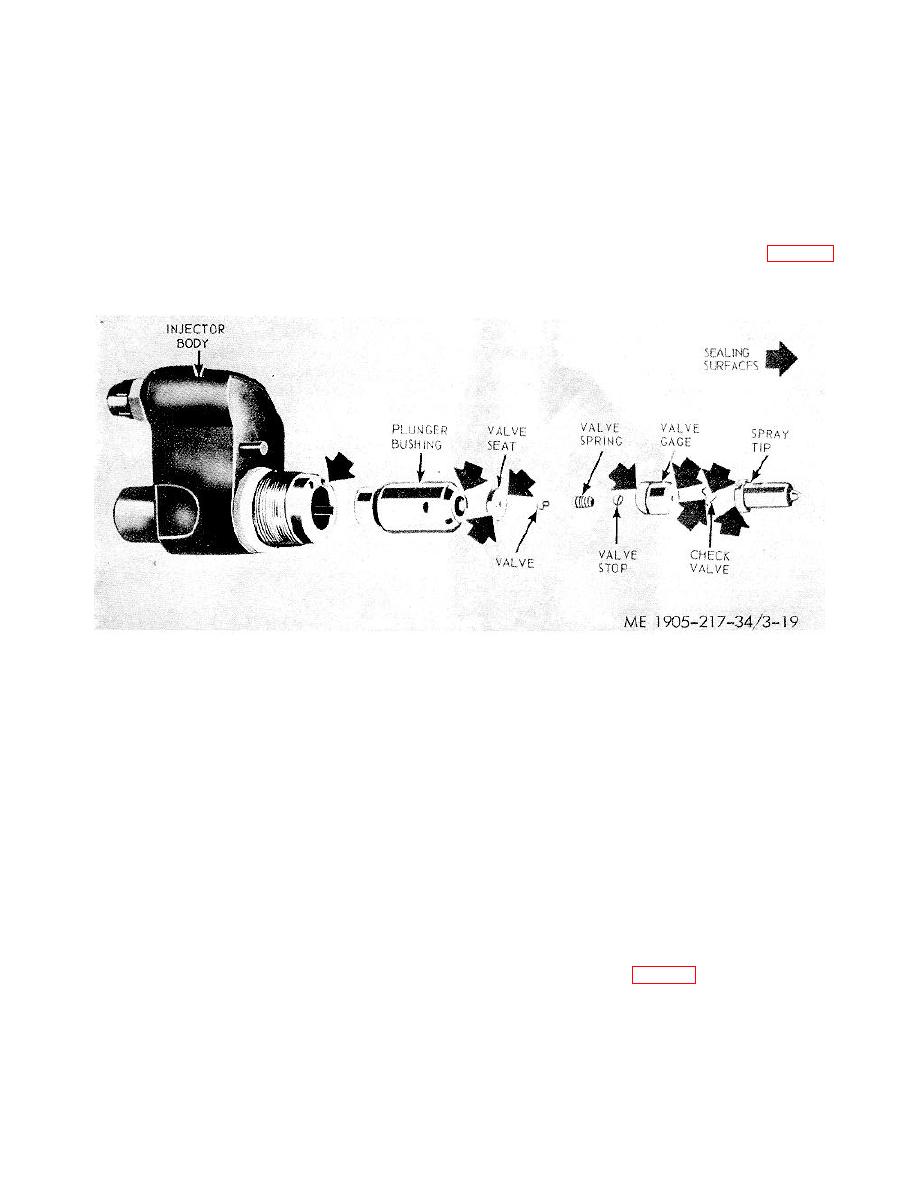
(12) Inspect the sealing surfaces of the spray tip and valve parts as indicated by arrows, (fig. 3-19).
Inspect all surfaces with a magnifying glass for even the slightest imperfections will prevent the injector from
operating properly. Check for burs, nicks, erosion, cracks, chipping and excessive wear. Inspect the spray tip
for enlarged orifices. Replace damaged or worn parts. Refer to paragraph g below for lapping injector parts.
Figure 3-19. Fuel injector sealing surfaces which may require lapping
g. Lapping lnjector tarts.
(1) Clean the lapping block with filtered moisture free compressed air and spread a good quality, 600 grit
dry lapping powder on one side of lapping blocks.
CAUTION
Do not use cloth or other material for this purpose.
(2) Place the part to be lapped flat on the block and, using a figure eight motion, move it back and forth
across the block. Do not press on tie part, but use just enough pressure to keep the part flat on the block. It is
important that the pert be kept flat on the block at all times.
(3) After each four or five passes, clean the lapping powder from the part by drawing it across a dean
piece of tissue placed on a flat surface and inspect the part. Do not lap excessively.
(4) When the lapped part is flat, wash it in cleaning solvent and dry with filtered compressed air. Place
the part on a second block and repeat the lapping procedure (paras (1) through (3) above for a fine finish.
g
(5) Wash and dry the part again and repeat the above lapping operation WITHOUT lapping powder.
This dry lapping will give the part a mirror finish required for perfect sealing.
(6) Only the edge of the hole in crown valve seat contacts the valve, this edge must be nearly perfect,
must be a true circle and present an unbroken surface. Examine the edge of the hole under a magnifying glass
for chipping or cracks. If the edge of hole shows irregularities, the hole must be lapped.
(7) Position a drill motor in a vice and mount the lapping tool in the motor (fig. 3-20) and place a small
amount of oil mixture on the tool.
3-21
|
||
|
||


