
| Tweet |

Custom Search
|
|

|
||
 TM 55-1905-217-34
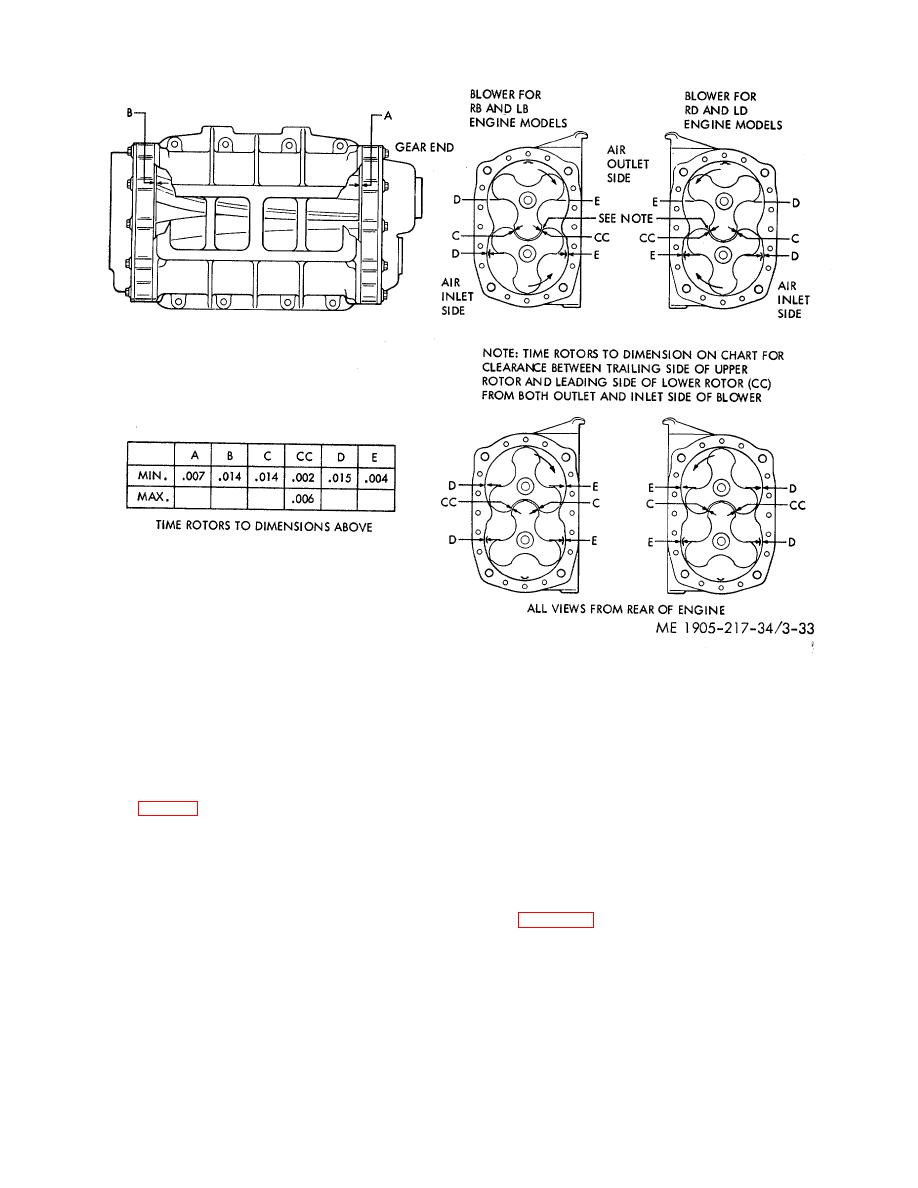
Figure 3-33. Chart of minimum clearances for blower
(15) Install the blower rotor tim ing gears blower as follows:
NOTE
One serration is omitted on the drive end of each blower rotor shaft and a corresponding
serration is omitted in each gear. Assemble the gears on the rotor shafts with the
serrations in alinement.
(a) Place the blower housing and rotor assembly on the bench with the air inlet side of the housing facing up and
the rear end (serrated end of rotor shafts) of the blower facing the outside of the bench.
(b) Rotate the rotors to bring the omitted serrations on the shafts in alignment and facing the top of the blower
housing (fig. 3-28).
(c) Install the same number and thickness of shims on the rotor shafts that were removed at the time of
disassembly.
NOTE
When rebuilding a blower with new rotors or new gears, first install the gears on the rotor
shafts without the shims, then check the clearances between the rotors to determine the
location and thickness of shims to be used; refer to figure 3-32.
(d) Lubricate the serrations of the rotor shafts with engine oil.
(e) Place the teeth of the rotor gears in mesh so that the omitted serrations inside the gears are in alignment and
facing the same direction as the serrations on the shafts.
NOTE
A center punch mark placed in the end of each rotor shaft at the omitted serrations will
assist in alining the gears on the shafts.
(f) Start both rotor gears straight on the rotor shafts with the right-hand helix gear on the right-hand helix rotor and
the left-hand helix gear.
3-47
|
||
|
||


