
| Tweet |

Custom Search
|
|

|
||
 TM 55-1905-217-34
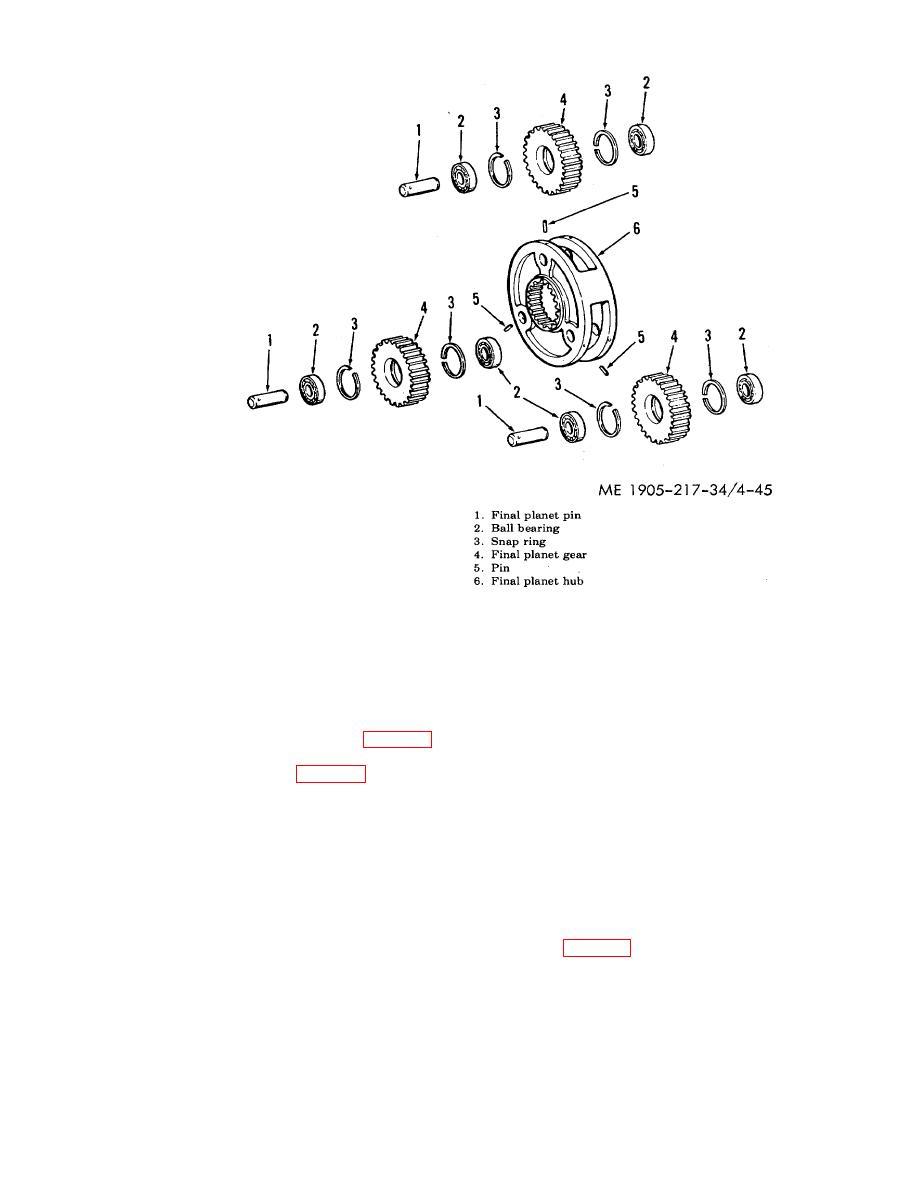
Figure 4-45. Final planet assembly (hulls 8520-8560 and 8580-8615), disassembly and
reassembly
(b) Remove the final planet pin (1) by tapping it out of the planet hub (6) so that it is removed
from the splined bore side of the planet hub. Remove pin (5) from the planet pin (1).
(c) Now remove the planet gear (4).
(d) Drive the ball bearings (2) out of the planet gear (4) using a drift. Remove the snap rings (3)
only if they are to be replaced because of damage.
(5) Primary planet assembly (12, fig. 4-44). Replace as an assembly. Disassembly by direct support or
general support personnel is not recommended.
(6) Motor assembly (8, fig. 4-44). Replace as an assembly. Disassembly by direct support or general
support is not recommended.
d. Cleaning, Inspection, and Repair.
(1) Inspection of final drive assembly.
(a) Wash all parts in a solvent (FED. SPEC. PD-680) and dry thoroughly with compressed air or
clean cloths.
CAUTION
Do not dry the final planet assembly with compressed air, as this may drive
(b) Check for wear at the center of the thrust plate (3, fig. 4-42). The original thickness at the
center of the thrust plate was 1.363 inches, if the wear is greater than 3/32 inch replace the thrust plate.
(c) Check that the planet gears run freely in the final planet assembly (2).
(d) Inspect the gear teeth in the final housing (1). If wear is greater than .015" when compared to
the unworn part of the teeth, replace the final housing (1). Check the large pilot bore at the end of the final
housing (1) used to carry the end cover (4). Remove all roughness and scores carefully using a scraper and
extra fine emery cloth so that preformed packing (5) will seal on this diameter.
4-68
|
||
|
||


