
| Tweet |

Custom Search
|
|

|
||
 TM 55-1905-242-14
0073 00
SERVICE (continued)
7.
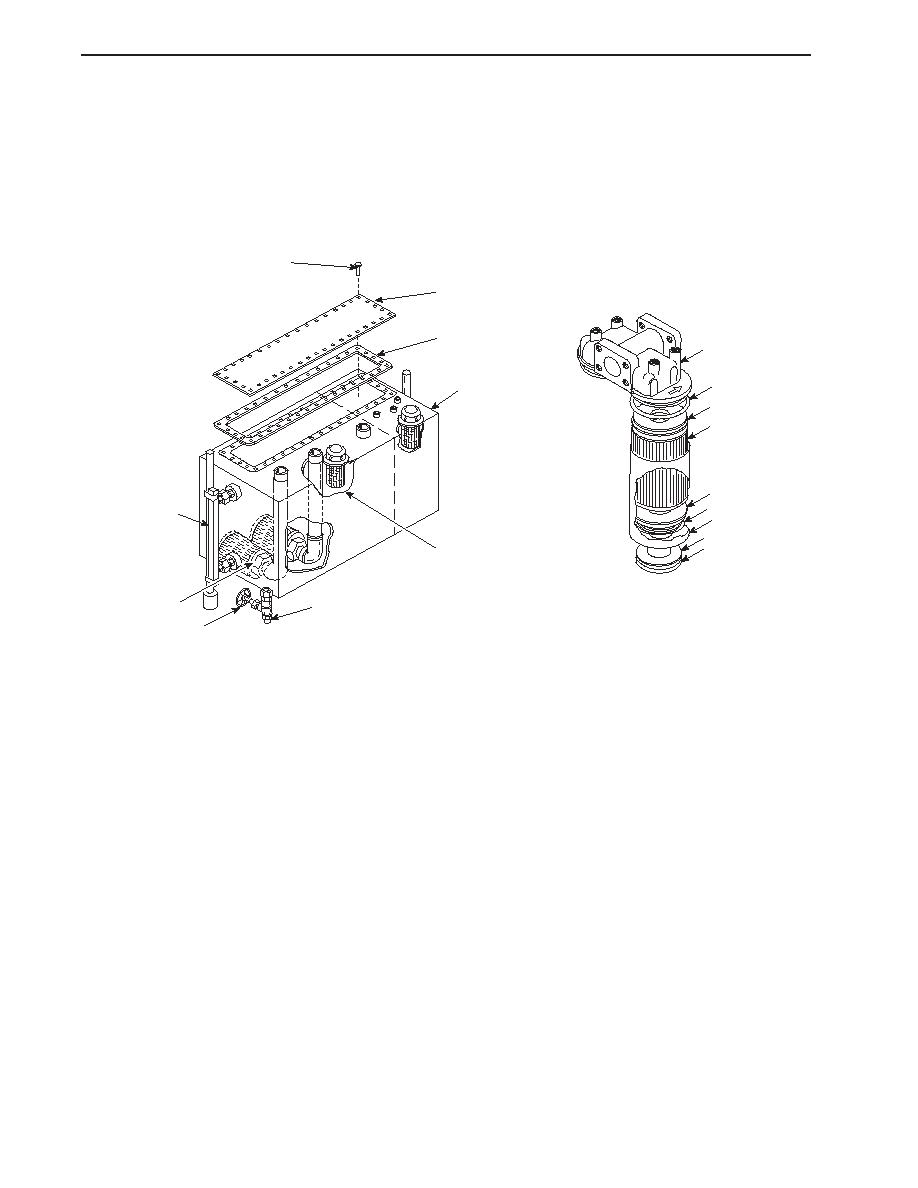
Remove the filler/breather filter screen (7) and clean it with cleaning solvent. Inspect the filler/breather filter screen for
clogging and other defects. If the filler/breather filter screen is damaged or clogged, obtain a new one.
8.
Remove the suction strainers (8) and clean them with cleaning solvent. Inspect the suction strainers for clogging and
other defects. If a suction strainer is damaged or clogged, obtain a new one.
3
4
6
11
15
5
14
12
17
16
18
10
13
9
7
8
1
2
9.
Install the suction strainers (8) and filler/breather filter screen (7).
10. Position the inspection cover (4) and gasket (6) onto the reservoir (5).
11. Secure the inspection cover (4) to the reservoir (5) using the bolts (3).
12. Position a suitable drain pan beneath one of the hydraulic filter assemblies.
13. Loosen the center post (9) on the hydraulic filter assembly.
14. Remove the center post (9) and filter housing (10) together from the filter head (11).
15. Remove the filter element (12), center post gasket (13), two filter base seals (14), O-ring (15), conical spring (16), and
backup washer (17).
16. Clean all of the removed parts, except the filter element (12), with cleaning solvent and wiping rags.
17. Install a new center post gasket (13) and the filter housing (10) on the center post (9).
18. Install the conical spring (16), backup washer (17), new filter base seals (14), new filter element (12), and a new O-ring (15)
into the filter housing (10).
19. Fill the filter housing (10) with clean hydraulic fluid and install the filter assembly onto the filter head (11).
0073 00-2
|
||
|
||


