
| Tweet |

Custom Search
|
|

|
||
 TM 55-1905-242-14
0079 00
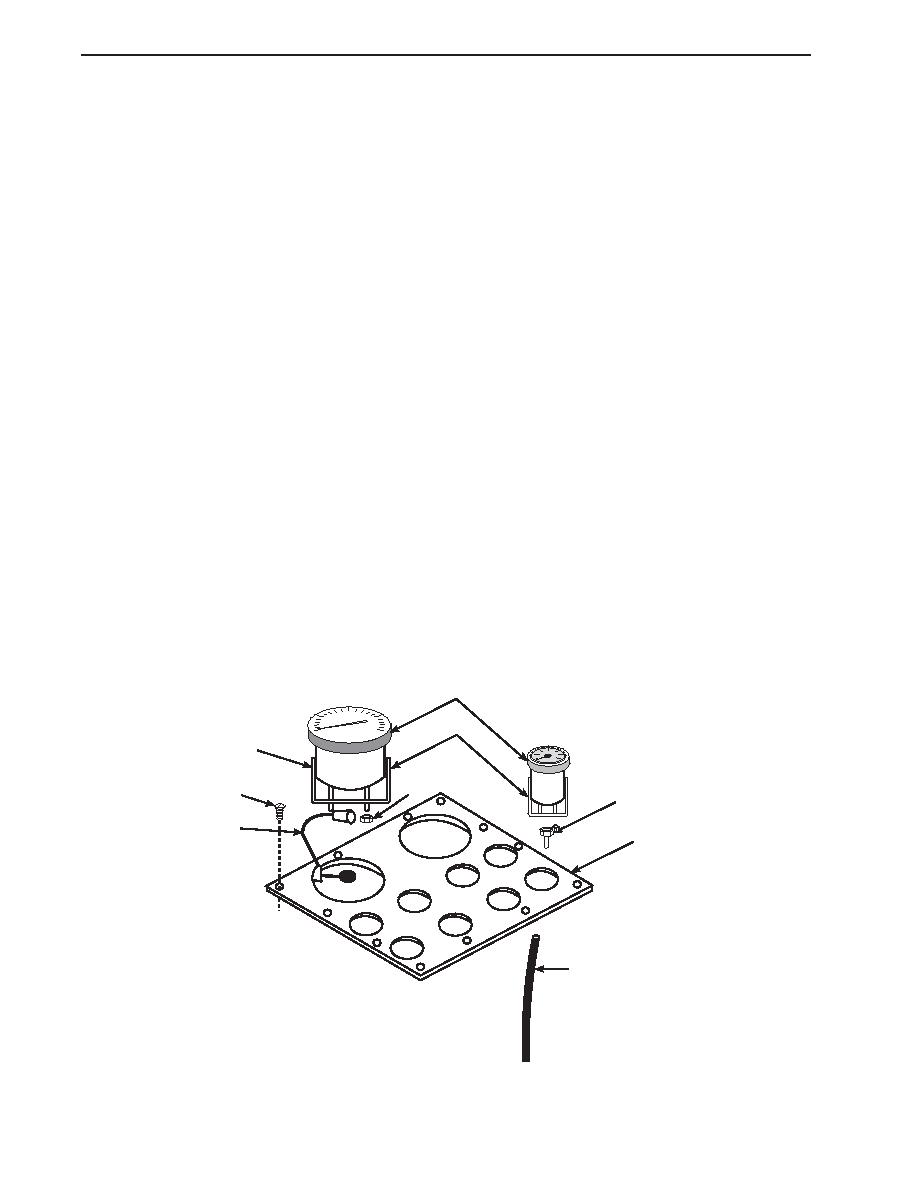
REMOVAL--ALL GAUGES (continued)
3.
Set the multimeter to the Vdc (Volts direct current) setting and check for voltage at the gauge wiring (3) on all of the
gauges. If no voltage is noted, continue with the procedure. If voltage is noted at any of the gauges, check to ensure
that the proper circuit breaker is properly secured.
4.
Depending upon the gauge type (electric sender or direct reading), proceed to the following paragraphs.
REMOVAL--GAUGES WITH ELECTRIC SENDERS
1.
Label and disconnect the gauge wiring (3) from the gauge (4).
2.
Remove the nuts (5) that secure the gauge clamp bracket (6) to the back of the gauge (4).
3.
Remove the gauge (4) from the gauge panel (2).
REMOVAL--DIRECT-READING GAUGES
1.
Don chemical protective gloves and goggles.
2.
Label and disconnect the gauge wiring (3), if any, from the gauge (4).
3.
Position a clean wiping rag below the gauge to catch any fluid that may leak, and remove the line (7) from the rear of the
gauge (4).
4.
Remove the nuts (5) that secure the gauge clamp bracket (6) to the back of the gauge (4).
5.
Remove the gauge (4) from the gauge panel (2).
6.
If any connectors (8) are attached to the back of the gauge (4), remove them.
4
20
30
10
6
40
0
6
5
1
8
3
2
7
0079 00-2
|
||
|
||


