
| Tweet |

Custom Search
|
|

|
||
 TM 55-1905-242-14
0087 00
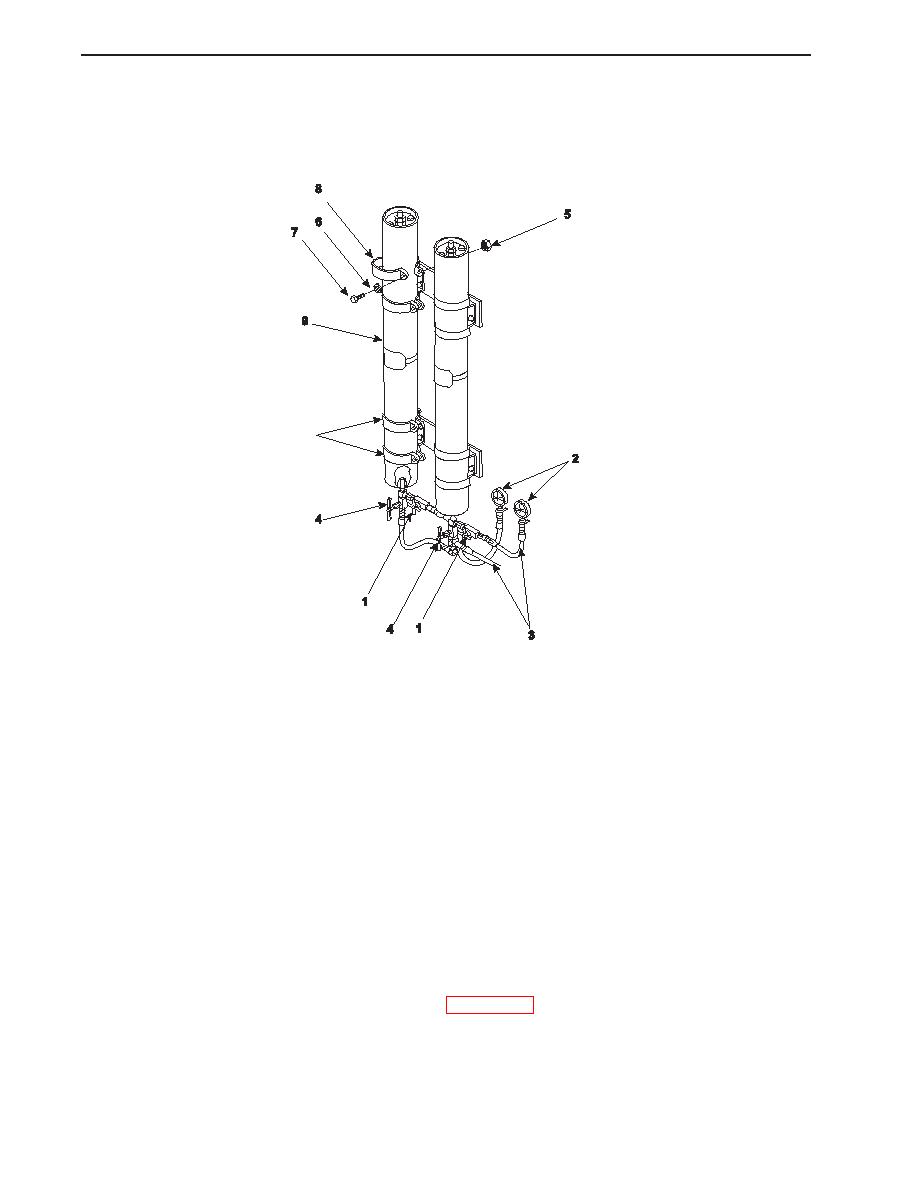
REMOVAL (continued)
6.
Remove the nuts (5), lockwashers (6), and bolts (7) that secure the mounting brackets (8) to the accumulator (9).
7.
Remove the accumulator (9) from the mounting brackets (8).
8
INSTALLATION
1.
Position the accumulator (9) on the bulkhead and secure it in place with the mounting brackets (8), bolts (7),
lockwashers (6), and nuts (5).
2.
Apply antiseizing sealant tape to the male pipe threads, and install the accumulator shutoff valves (4) and accumulator
gauge valves (1) into the accumulator (9) using the labels from step 5 of Removal as a guide.
3.
Install the hydraulic lines (3) onto their respective valves (1 and 4) using the labels from step 4 of Removal as a guide.
4.
Remove the lockouts and tagouts, charge the system, and check the system operation. Also check for any sign of
leakage.
5.
Check the hydraulic fluid level in the reservoir and replenish it as necessary.
6.
Dispose of used hydraulic fluid and contaminated materials in accordance with local regulations.
SERVICE
1.
Check the accumulator precharge pressure as described in WP 0022 00.
2.
If the accumulator precharge pressure is low, notify direct support maintenance for repair.
END OF WORK PACKAGE
0087 00-2
|
||
|
||


