
| Tweet |

Custom Search
|
|

|
||
 TM 55-1905-242-14
0133 00
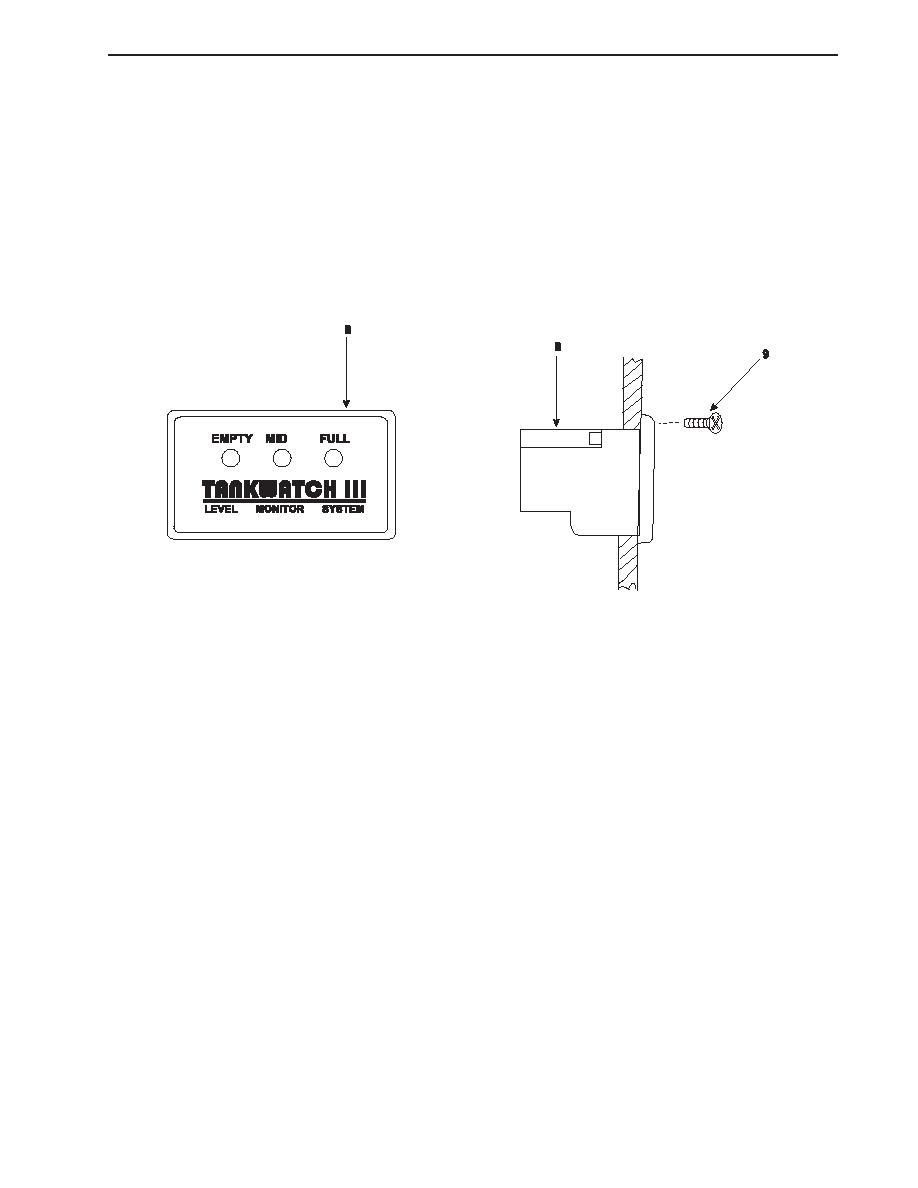
REMOVAL--DISPLAY UNIT
1.
Remove the lower starboard panel from the console.
2.
Set the multimeter to the Vdc (Volts direct current) setting. Place the positive multimeter lead on terminal #2 on the back
of the display unit (8) and the negative lead on the #4 terminal on the back of the display unit. If no voltage is detected,
proceed to the next step. If voltage is detected, ensure that the circuit breaker is properly secured.
3.
Label and remove the wiring from the back of the display unit (8).
4.
Remove the four screws (9) that secure the display unit (8) to the panel.
INSTALLATION--DISPLAY UNIT
1.
Position the display unit (8) in the panel and secure it with four screws (9).
2.
Connect the wiring to the back of the display unit (8) using the labels from step 3 of Removal--Display Unit as a guide.
3.
Install the lower starboard panel onto the console.
4.
Remove the lockouts and tagouts and check the operation of the system.
END OF WORK PACKAGE
01330133 00-3
00-3/4 blank
|
||
|
||


