
| Tweet |

Custom Search
|
|

|
||
 TM 55-1905-242-14
0165 00
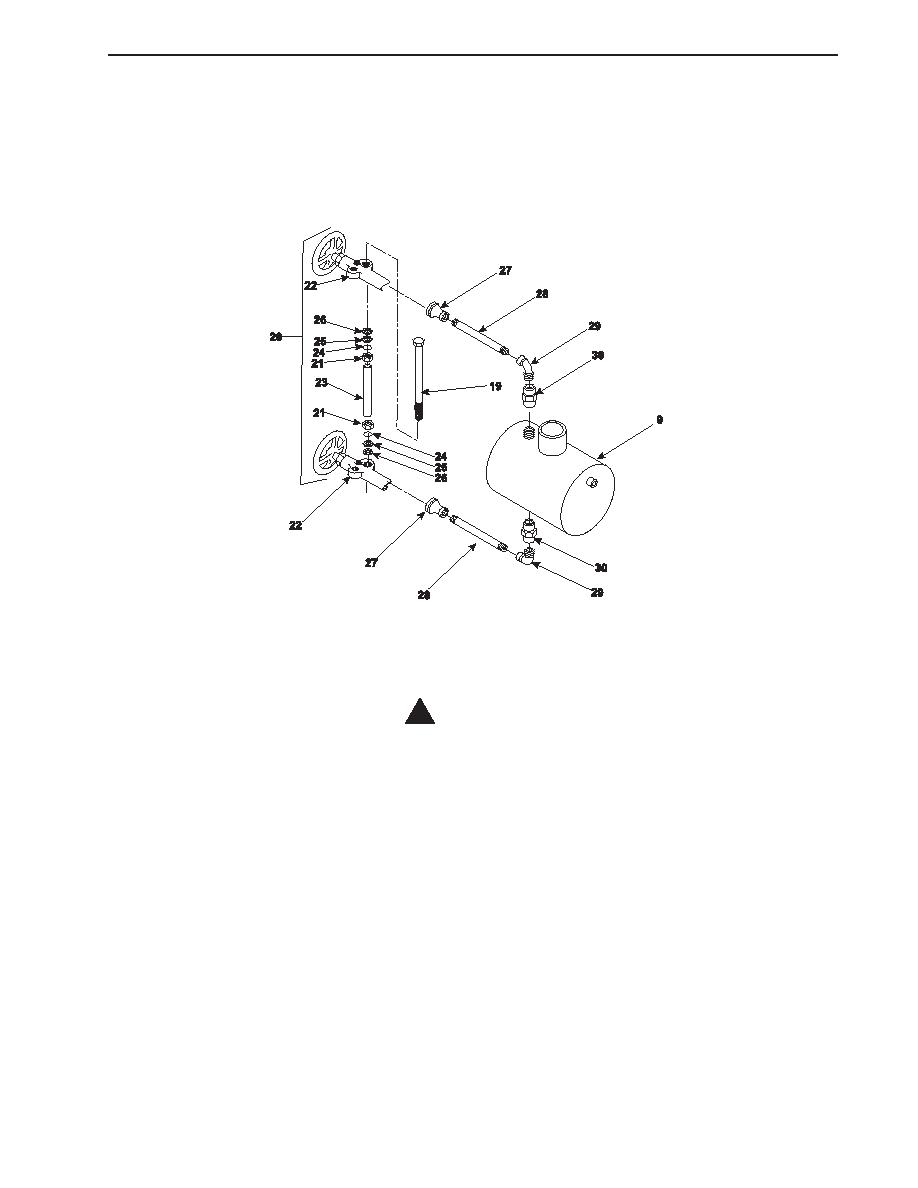
DISASSEMBLY (continued)
4.
Remove the O-rings (24, 25, and 26) from the upper and lower valves (22). Discard any defective O-rings.
5.
Unscrew the upper and lower valves (22) from the reducing couplings (27).
6.
Remove the pipe nipples (28) and street elbows (29) from the expansion tank couplings (30).
REPAIR
! CAUTION
Improper connection of ground leads can cause serious electrolytic and electronic
damage to the vessel and its components. Always ensure that ground leads are con-
nected in accordance with TB 55-1900-204-24.
1.
Weld any cracks or breaks in the expansion tank (9). Replace the expansion tank if it is damaged beyond repair.
2.
Replace defective hoses, hose clamps, fittings, valves, sight glass, or O-rings.
ASSEMBLY
1.
Wrap the male pipe threads of the street elbows (29) with antiseizing sealant tape and thread them into the expansion
tank couplings (30).
2.
Wrap the male pipe threads of the pipe nipples (28) with antiseizing sealant tape and thread the pipe nipples into the
street elbows (29).
3.
Wrap the male pipe threads of the upper and lower valves (22) and reducing couplings (27) with antiseizing sealant tape
and thread the upper and lower valves and reducing couplings onto the pipe nipples (28). Ensure that the upper and
lower valves are oriented to allow proper installation of the sight glass (23).
4.
Install the O-rings (24, 25, and 26) into the upper and lower valves (22).
0165 00-3
|
||
|
||


