
| Tweet |

Custom Search
|
|

|
||
 TM 55-1905-242-14
0172 00
DISASSEMBLY (continued)
7.
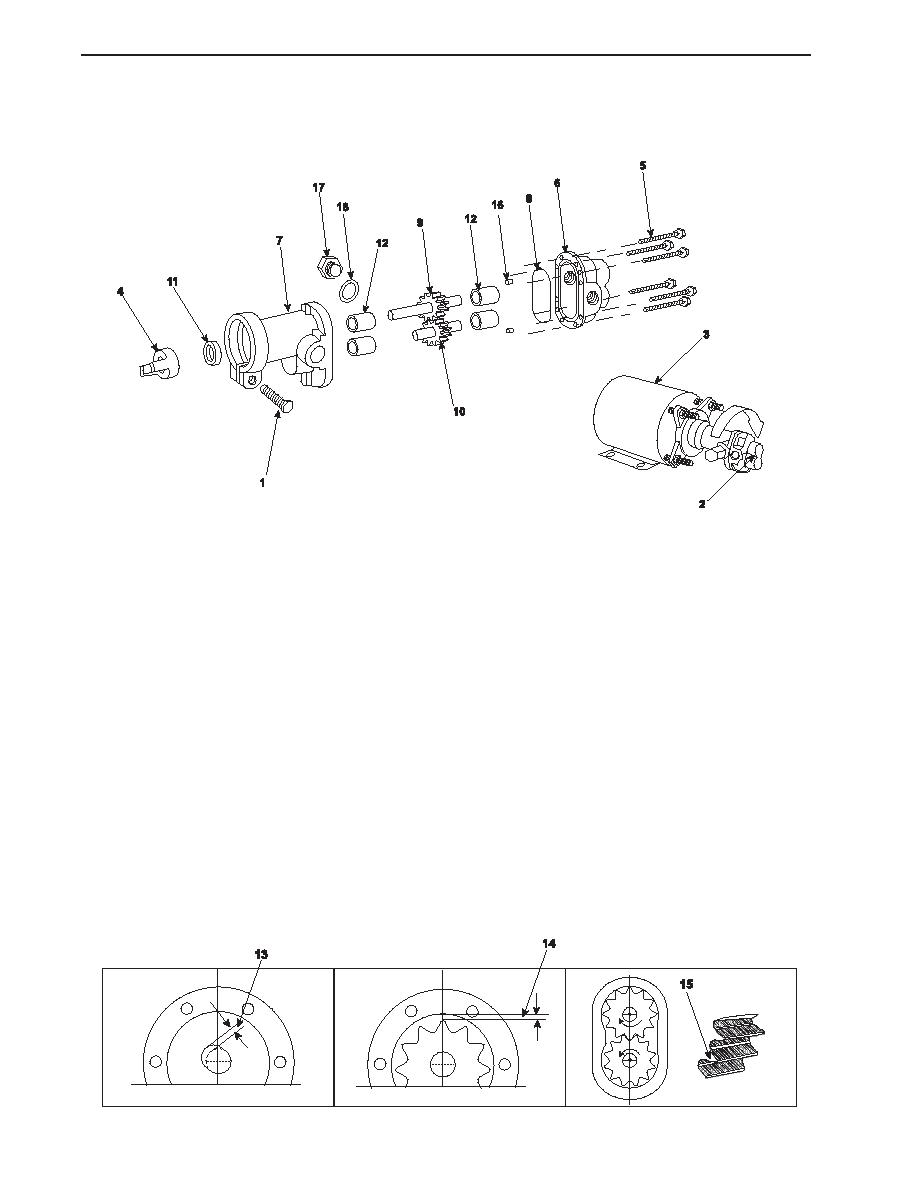
If the bearings (12) will be replaced, use a small chisel to chip them out of their bores. The bearing material is very brittle
and will chip out easily. Take care not to damage the bearing bores during removal.
CLEANING AND INSPECTION
1.
If not already on, don protective gloves and goggles.
2.
Wash all parts in cleaning solvent and dry them with clean wiping rags.
3.
Check the cover (7) and body (6) for signs of wear or scoring. Replace the body and/or cover if scoring or wear is
present.
4.
Check the amount of bearing wear by sliding the exposed (coupling) end of the drive gear (9) shaft into each of the four
bearings (12) and check for side play. Replace the bearings if the shaft side play (13) exceeds 0.006 inch (0.15 mm). A new
shaft in new bearings should have a side play of 0.002 to 0.003 inch (0.05 to 0.08 mm). If the bearings require replacement,
replace them before performing the remaining clearance inspections.
5.
Check the clearance between the gear teeth and the gear chamber (14) by installing the gears and measuring the clearance
with a feeler gauge. If the gear teeth to gear chamber clearance exceeds 0.010 inch (0.25 mm), the waste oil pump (2) is beyond
repair and must be replaced.
6.
Check the gears for gear teeth wear (15). Gear teeth wear occurs on the pressure face of each tooth only. The extent of
wear can be approximated by visualizing the tooth profile on the back face transposed to the pressure face. Replace the
gears if they show signs of wear.
0172 00-2
|
||
|
||


