
| Tweet |

Custom Search
|
|

|
||
 TM 55-1905-242-14
0173 00
CLEANING AND INSPECTION
1.
If not already on, don protective gloves and goggles.
2.
Clean all parts in cleaning solvent and dry with clean wiping rags.
3.
Inspect the cylinder and head for rust, signs of wear, or gouging. Rust and light wear can be dressed out by sanding.
4.
Inspect the vanes for wear or breakage. Replace the vanes if worn or broken.
ASSEMBLY
1.
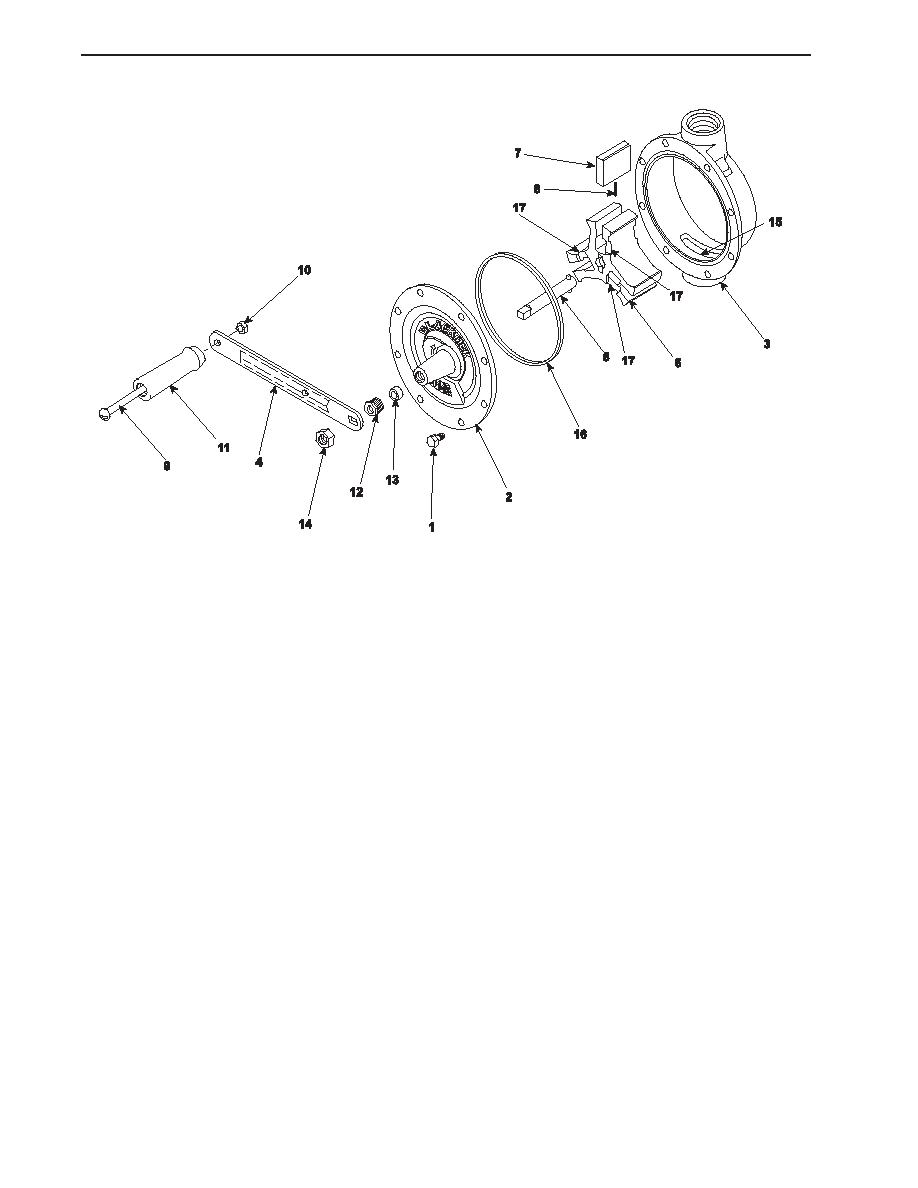
Lay the cylinder (3) flat on the workbench with the internal port recesses (15) to the right.
2.
Position the O-ring (16) in its groove on the cylinder (3).
3.
Place the rotor (6) in the cylinder (3) with the relief grooves (17) facing in the direction of rotation (clockwise).
4.
Insert the springs (8) into the vanes (7).
5.
Place a vane (7) with spring (8) installed into the slot in the rotor (6). The spring must face the center of the rotor.
6.
Compress the spring (8) against the bottom of the vane slot and slide the vane into position. Ensure that the spring
enters the corresponding hole in the rotor slot.
7.
Repeat steps 5-6 for the remaining two vanes (7).
8.
Position the head (2) assembly on the cylinder (3), ensuring that the shaft and pin assembly (5) engages the slot in the
rotor (6).
0173 00-2
|
||
|
||


