
| Tweet |

Custom Search
|
|

|
||
 TM 55-1905-242-14
0198 00
REMOVAL (continued)
3.
Repeat step 2 for the other keel cooler connection.
4.
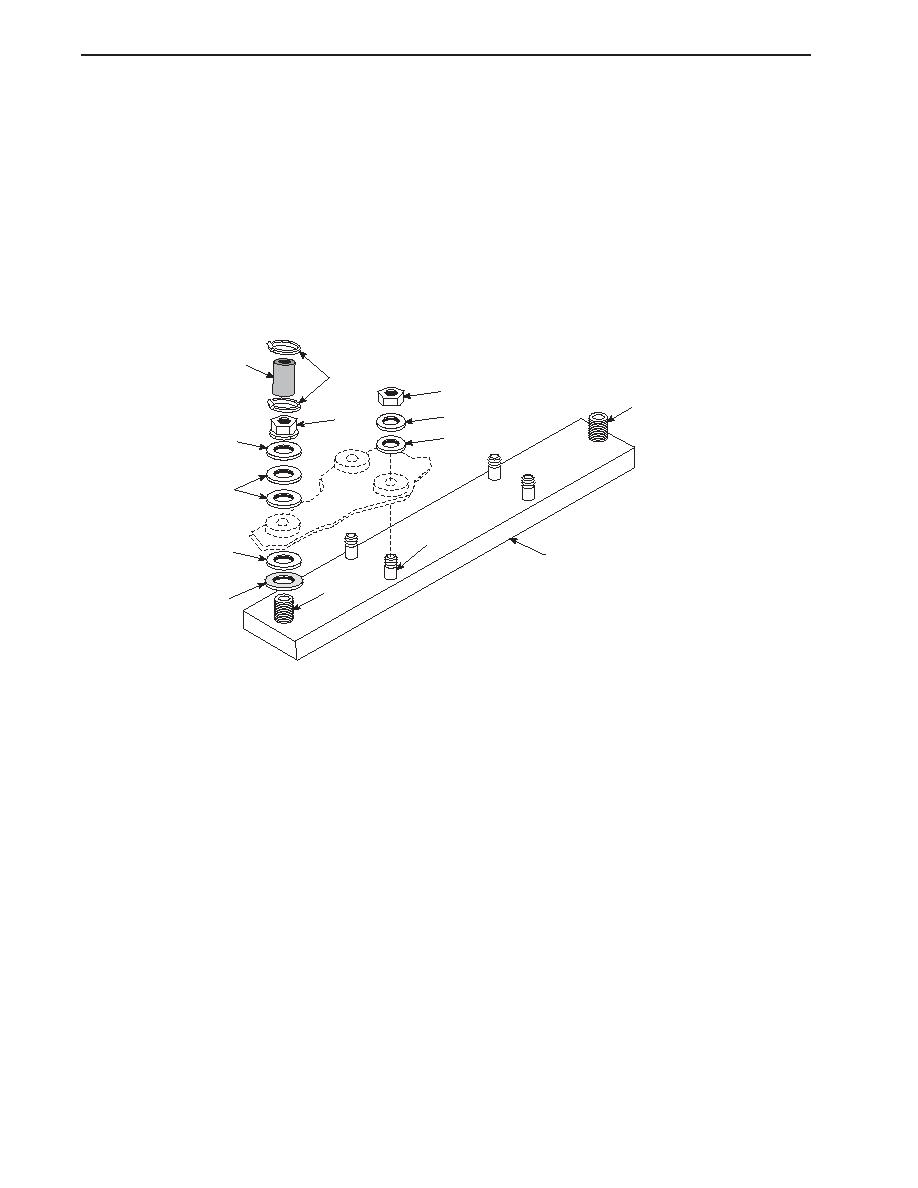
Remove the nuts (3), copper washers (4), and neoprene gaskets (5) from each end of the keel cooler (6).
5.
Remove the nuts (7), flat washers (8), and neoprene gaskets (9) from the mounting studs (10).
6.
Remove the keel cooler (6) from the hull.
7.
Remove the copper washers (11) and neoprene gaskets (12) from the keel cooler (6).
2
1
7
13
8
3
9
4
5
10
11
6
13
12
TESTING
1.
Cap one keel cooler fitting (13) to hold air under approximately 20 lb/in (1.4 bar).
2.
Cap the other keel cooler fitting (13) with a cap that will accommodate the air compressor hose.
3.
Pressurize the keel cooler (6) to approximately 10 lb/in (0.7 bar) and submerge the keel cooler in a tank of clear water,
not allowing the capped keel cooler fittings (13) to become submerged.
4.
Visually inspect for any air bubbles that would indicate a leak. A steady stream of bubbles will indicate a leak. An
occasional bubble may indicate air trapped in the keel cooler coils upon submersion.
5.
If a leak is found, the keel cooler (6) must be replaced.
REPAIR
1.
Replace all gaskets (5, 9, and 12).
2.
Replace all damaged or defective hardware.
3.
Replace defective hoses (2) or hose clamps (1).
0198 00-2
|
||
|
||


