
| Tweet |

Custom Search
|
|

|
||
 TM 55-1905-242-14
0209 00
DISASSEMBLY (continued)
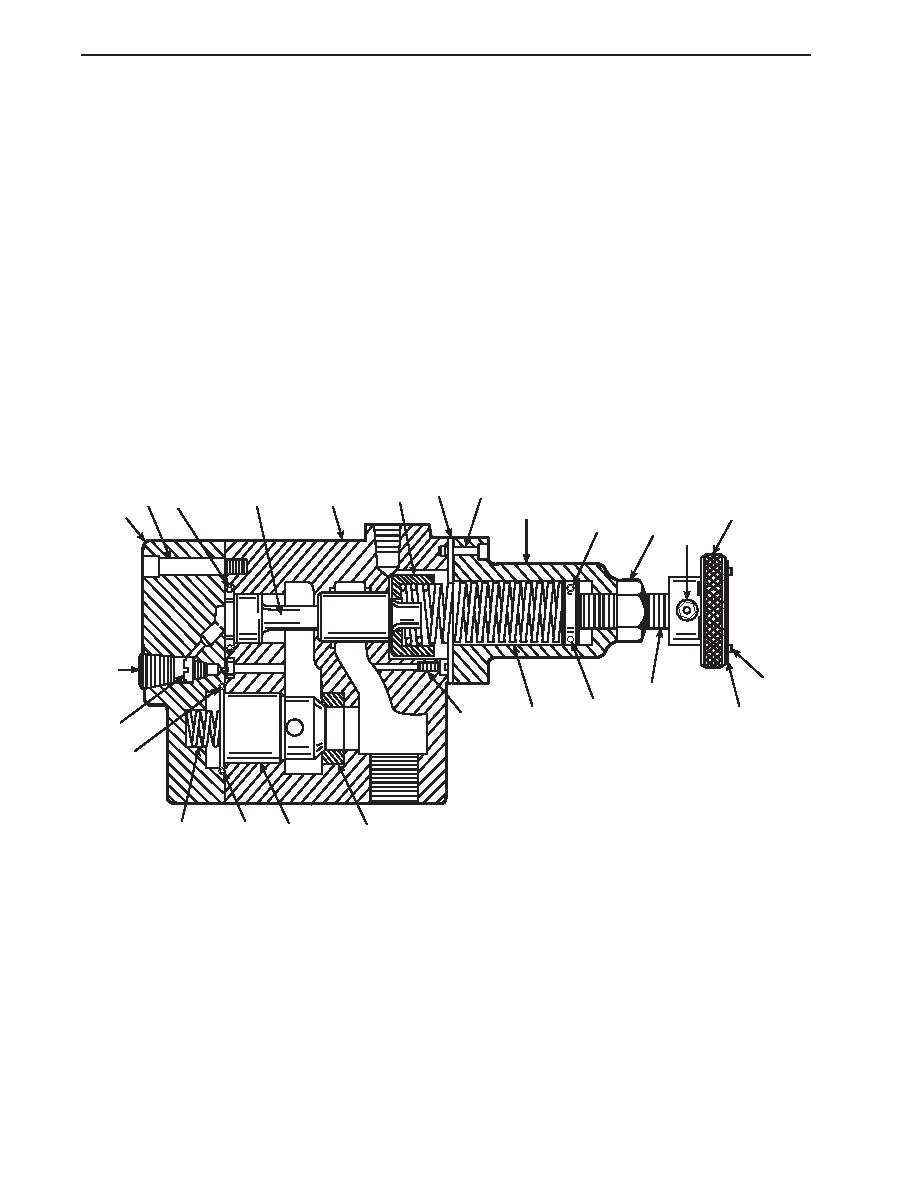
5.
If damaged or illegible, remove the drive screws (9) and identification plate (10) from the adjusting knob (11).
6.
If the adjusting knob (11) is damaged or defective, loosen the setscrew (12) and remove the adjusting knob from the
adjusting screw (8).
7.
Remove the pipe plug (13) and plug (14) from the bottom cap (15).
8.
Remove the screws (16) that secure the bottom cap (15). Remove the bottom cap.
9.
Remove the check spring (17) and preformed packing (18, 19, and 20).
10. Remove the main spool (21) and spring stop and seat (22).
11. Remove the check spool (23).
12. Remove the screw (24).
13. Remove the check spool seat (25) from the body (26).
3
1
22
26
21
16
20
15
2
11
6
7
12
13
9
8
5
4
10
24
14
19
18
23
17
25
CLEANING
1.
If not already on, don protective gloves and goggles.
2.
Clean all metal parts in cleaning solvent and dry with clean wiping rags.
0209 00-2
|
||
|
||


