
| Tweet |

Custom Search
|
|

|
||
 TM 55-1905-242-14
0213 00
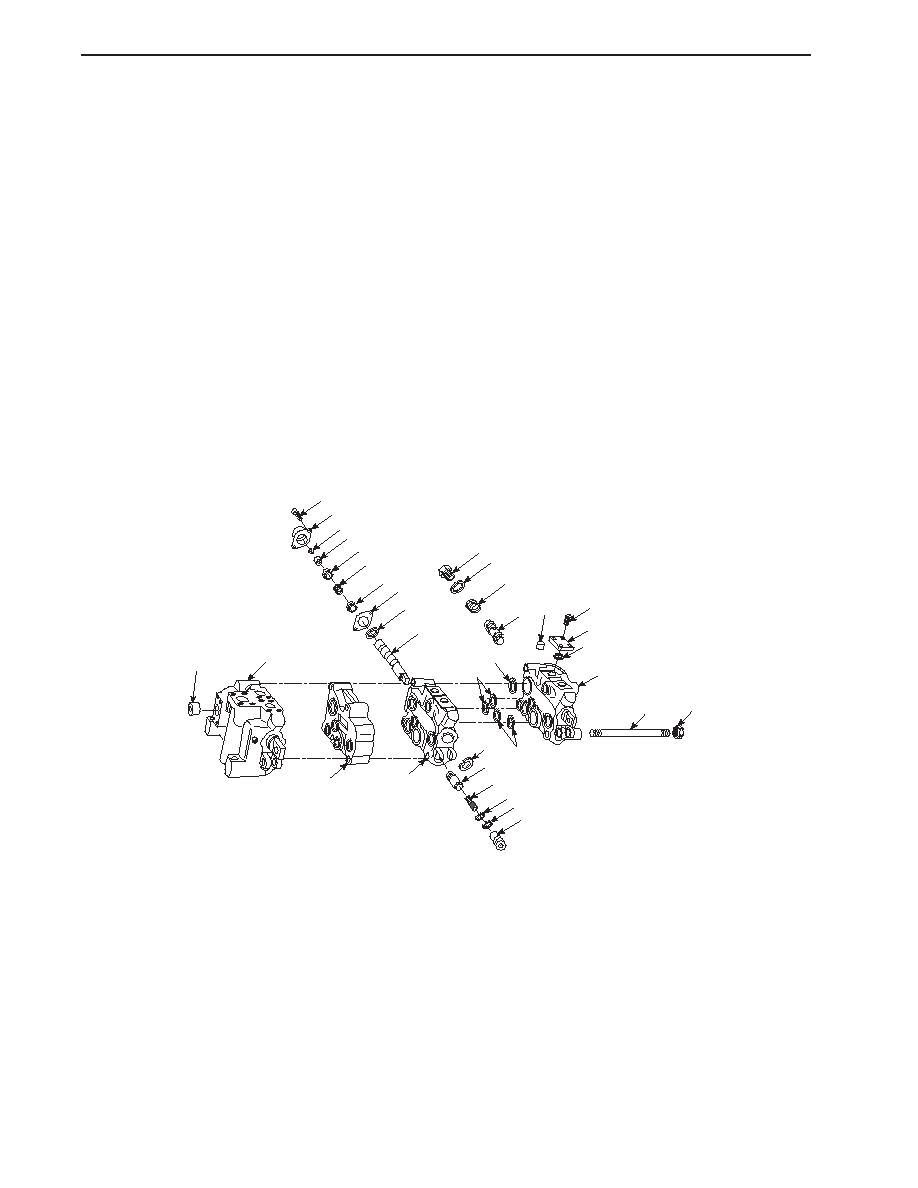
DISASSEMBLY (continued)
4.
Separate section (4) from section (5).
5.
Remove the packing (6 and 7) from the valve body (3).
6.
Remove the capscrews (8), plate (9), and plate packing (10).
7.
Remove the pipe plug (11) from the valve body (3) if it is damaged or leaking.
8.
Remove the valve plug (12), packing (13), spring (14), and valve subassembly (15) from the valve body (3).
9.
Remove the capscrews (16) and end cap (17).
10. Remove the guide mounting machine screw (18), valve guide (19), retainers (20), spring (21), and flat retainer (22).
11. Withdraw the valve spool (23) and packing (24) from section (4).
12. Remove the pipe plug (25), reinforcing ring (26), packing (27), spring (28), poppet (29), and packing (30) from
section (4).
13. Remove the pipe plug (31) from the valve body (3).
16
17
18
19
20
12
13
21
20
14
22
24
8
15 11
9
23
10
3
6
31
7
3
1
2
30
7
29
4
5
28
27
26
25
CLEANING
1.
If not already on, don chemical protective gloves and goggles.
2.
Clean all metal parts in cleaning solvent and dry with clean wiping rags.
INSPECTION
NOTE
Minor nicks and burrs may be polished out on all parts except the valve spool. Replace
all parts showing more significant damage.
0213 00-2
|
||
|
||


