
| Tweet |

Custom Search
|
|

|
||
 TM 55-1925-204-12
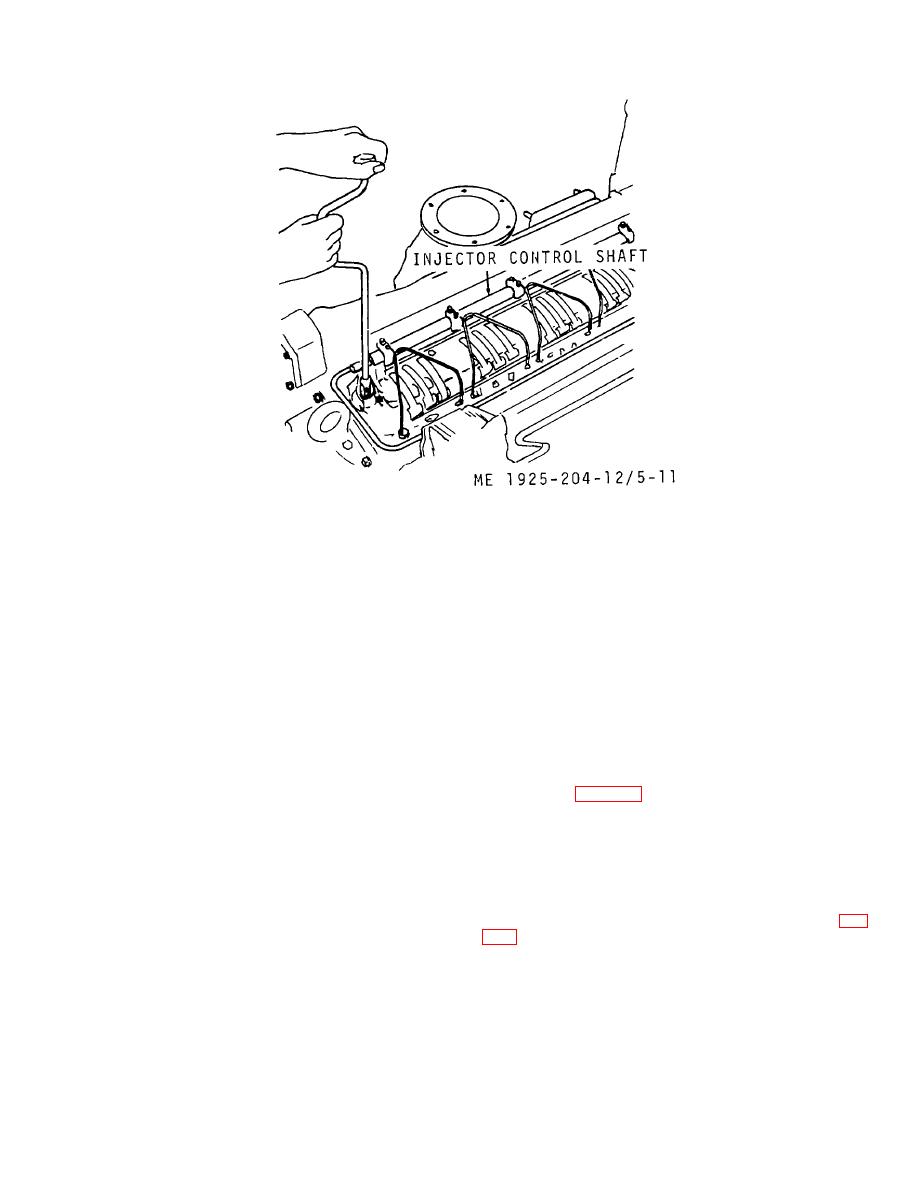
Figure 5-11. Removing injector control shaft and fuel lines.
(i) Remove fuel lines from injector and
CAUTION
manifold.
(j) Tag and disconnect electrical leads
Do not set the cylinder head down with
from the instruments, and lines from pressure gages, then
bottom flat on bench or floor. The cam
remove the instrument panel. Remove the throttle control rod.
followers and injectors project below the
(k) Loosen (three or four turns) the two
bottom surface of the head, and would be
bolts directly below each lifter bracket. These bolts attach the
damaged. Use blocks for support.
balance weight cover to the front end plate, and the flywheel
housing to the rear end plate. They could interfere with
(c) Move the cylinder head to a clear work
cylinder head being lifted off the block.
area for further maintenance. Remove cylinder head gaskets,
(l) Remove the two capscrews securing
and oil and water seals.
the front lifter bracket to the balance weight cover. Also
c. Disassembly.
remove the two capscrews securing rear lifter bracket to
(1) Fuel injectors. Remove the fuel injectors by
flywheel housing.
removing nut from the injector clamp, then use the injector
(m) Remove the two capscrews securing
removing tool (table 4-1) to lift the injector from the cylinder
the heat exchanger vent casting to the balance weight cover,
head.
and the two capscrews securing vent casting to the heat
(a) Remove fuel line connectors.
exchanger expansion tank, then, remove casting and gasket.
(b) Remove the studs that secures the
(2) Cylinder head.
valve rocker cover to cylinder head.
(a)
Remove the 10 nuts from studs
(c) Remove the front and rear lifter
securing cylinder head to the block.
brackets.
(b) Insert lifting hooks into eyes of front
(d) Remove all external fuel oil line fittings.
and rear lifter brackets; then, raise the cylinder head slowly
(2) Rocker arms and valves. Remove bolts (fig.
and uniformly off the studs to avoid stud thread damage.
arms. Backoff locknuts, unscrew rocker arm clevis from the
push rods, then remove the rocker arms.
5-15
|
||
|
||


