| Tweet |

Custom Search
|
|

|
||
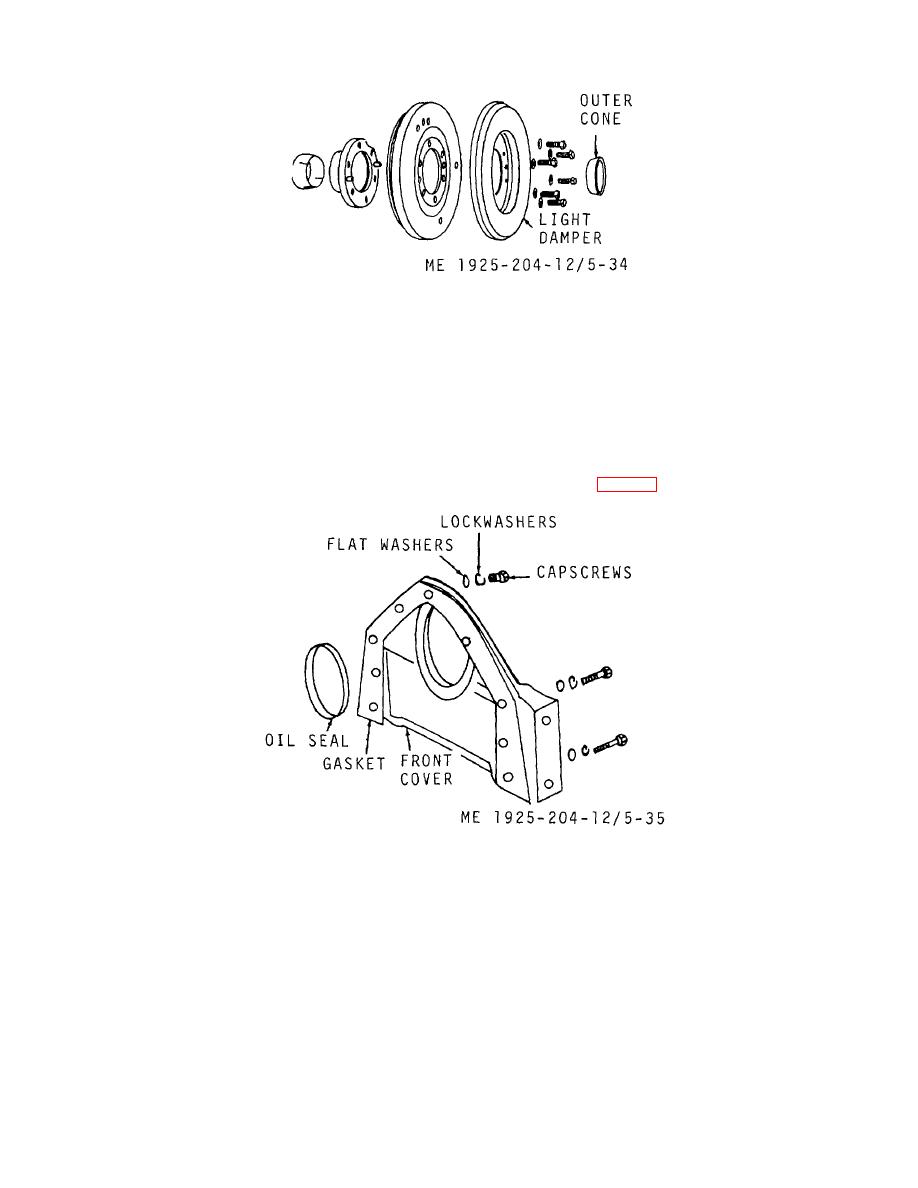
 Figure 5-34. Typical vibration damper details.
(f) Install the crankshaft pulley Id. above).
(c) If the light and heavy dampers were for
f. Front Cover.
any reason removed from the hub, assemble them on hub
(1) Removal.
with flat faces toward each other and on dowel pins and
(a) Remove crankshaft pulley (d. above).
secure with lockwashers and capscrews.
(b) Remove vibration damper (e. above).
(d) Slide the damper and hub as an
(c) When removing the crankshaft, or
assembly (long end of hub facing the crankshaft cover) into
preparing engine for overhaul, remove the front cover as
position on the crankshaft.
follows:
NOTE
1.
Remove the seven capscrews,
Refer to the caution at end of (1) above
lockwashers, (and flatwashers if installed) securing front cover
about hammering on the damper.
to front end plate (fig. 5-35).
(e) Slide the outer cone over the crankshaft
and into the hub of the damper.
Figure 5-35. Crankshaft front cover details.
2. Remove front cover carefully, by
(2)
Cleaning, inspection, and repair.
striking it with a soft hammer to free cover from dowel pins,
(a) Wash cover with clean fuel oil and blow
then pulling it straight off crankshaft.
dry with compressed air. Remove bits of gasket from all
3. Remove the front cover gasket
gasketing surfaces.
and discard.
4. Inspect the oil seal for damage
or deterioration. Replace a defective oil seal (b. above).
5-41
|
||
 |
||