
| Tweet |

Custom Search
|
|

|
||
 (d) Install flatwashers (if removed) and
(b) Inspect cover for cracks or other
lockwashers on capscrews and thread them through front
defects.
cover into front end plate.
(c) Replace a defective cover.
(e) Tighten the front cover attaching
(3) Installation.
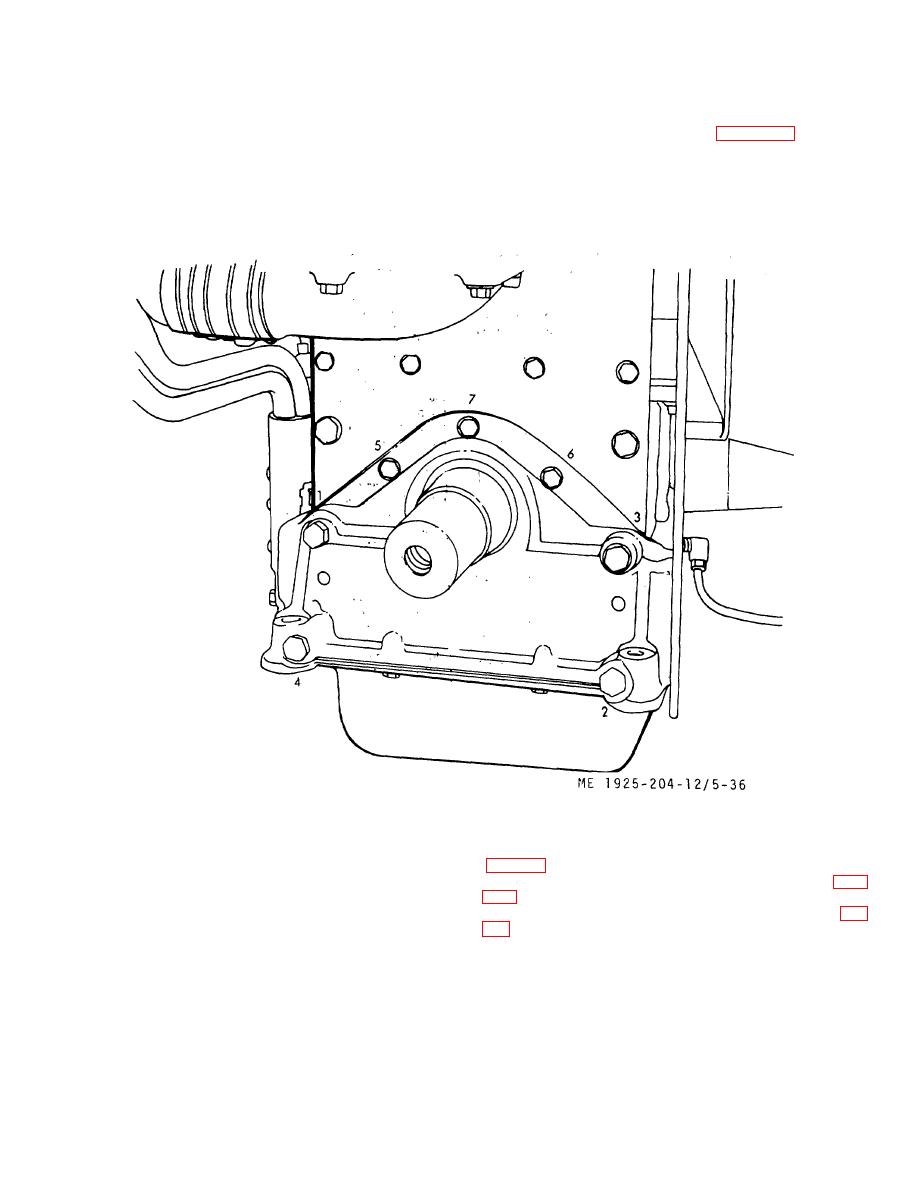
capscrews in the sequence shown on figure 5-36. Tighten 3/8
(a) Install a new oil seal, if required (b.
inch capscrews to a torque of 25-30 ft lbs, and the 1/2 -inch
above).
capscrews to a torque of 80-90 ft. lbs.
(b) Shellac a new gasket to the bolting
(f) Install crankshaft pulley (d. above).
flange of the crankshaft front cover.
(c) Coat the lip of front oil seal lightly with
grease, then slide cover over the crankshaft carefully sliding it
up to the front end plate.
Figure 5-36. Crankshaft front cover attaching hardware tightening sequence.
(d) Remove
accessories
as
necessary
g. Crankshaft.
(1) Removal. When removal of the crankshaft
(e) Disconnect the power generator (para
becomes necessary, proceed as follows:
(a) Clean exterior of engine thoroughly.
(f) Remove all engine mounting bolts (fig.
(b) Drain the cooling system.
(c) Drain the lubrication system (LO 55-
(g) Attach lifting sling to lifter brackets
1925-205-12-5).
5-42
|
||
|
||


