
| Tweet |

Custom Search
|
|

|
||
 (2) Before inspecting the removed block, wash it
(d) Apply 40 psi air pressure to the cylinder
with clean fuel oil, and blow dry with compressed air.
block and maintain pressure for at least two hours.
(3) Inspect the water passages for excess scale.
(e) At the end of test period, examine the
When scale exists, reclean with a solvent conforming to Fed
cylinder bores, air box, oil passages, crankcase (interior of
Spec P-D-680, then hose down with clean fresh water. Blow
block), and the exterior of the block for signs of the water-
dry with compressed air.
antifreeze mixture, which will indicate the presence of tracks.
(4) Reinspect water passages for freedom from
Replace a cracked block.
scale, then scrape all gasket material from gasket surfaces.
(f) After test is complete, turn off the air,
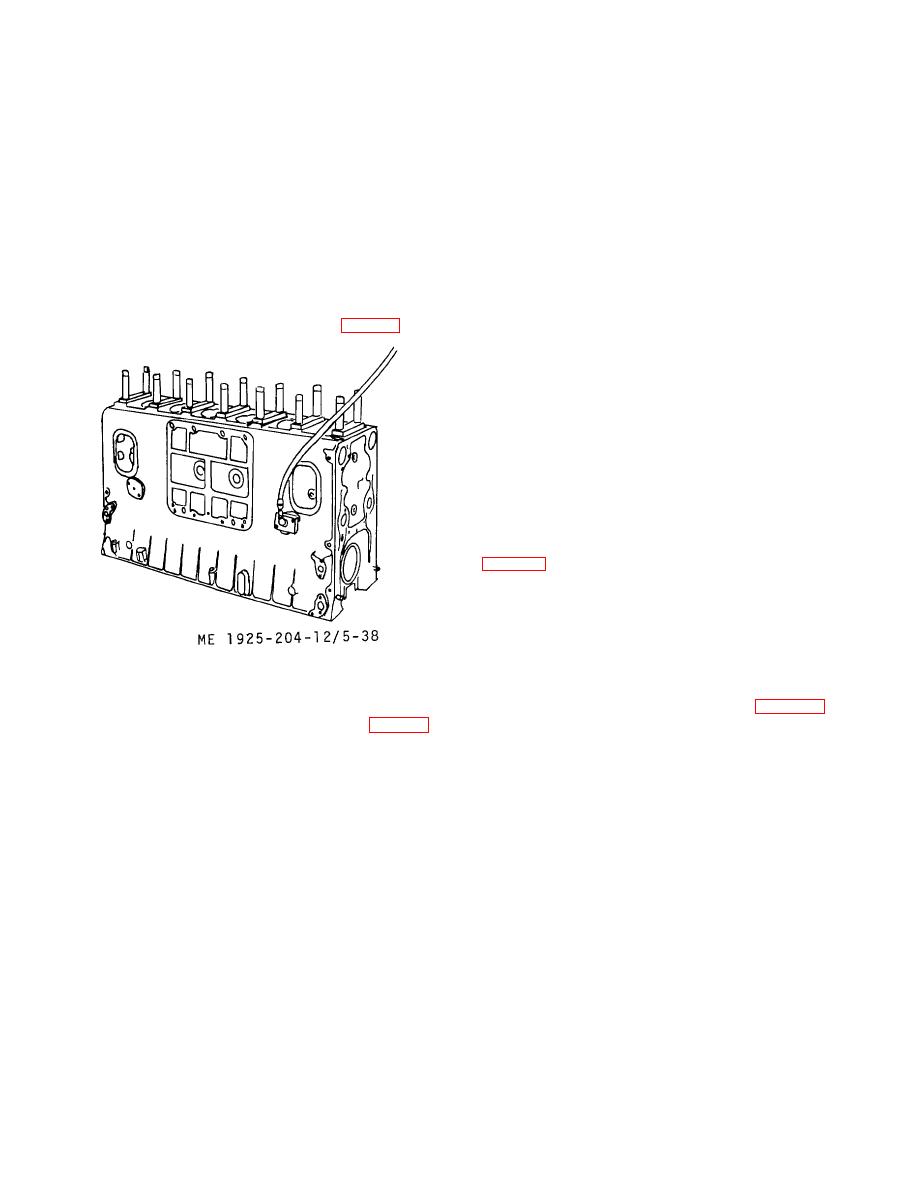
(5) Prepare the cylinder block for pressure test as
remove all plates, drain the block, and blow out all passages
follows:
with compressed air.
(g) Re-examine the block bores for
(a) Make five metal plates of 3/16 inch thick
roughness that requires clean-up. If honing is required, notify
material. Make plates 6 3/4-inches long and 2 inches wide.
GS maintenance.
Mark plate for two holes, to be centered one inch from each
(h) If the cylinder block cleaned up
end, and one inch from each edge. Where lines cross, use a
satisfactorily, and is without crack defects, proceed to d.
center punch to start drill, then drill 1 1/16-inch diameter holes
below.
that are 4 3/4 inch from center-to-center. Each plate to fit
d. Installation of Cylinder Block.
over two of the cylinder head hold down studs (fig. 5-38).
(1) After cleaning and inspection of the block,
clean and inspect engine parts and subassemblies, and, using
new parts as required, install them in and on the cylinder
block by reversing the sequence of removal in b. above.
(2) Install the air box covers and tighten
capscrews to a torque of 10-15 ft lb.
(3) Fill the engine lubricating system (LO 55-
6115-204-12/1).
(4) Fill the engine cooling system.
(5) Check for leaks (oil and water).
5-10. Oil Pump (Engine Lubricating)
a. General. The gear type oil pump is mounted on the
first and second main bearing caps and is driven by a gear (9,
operation the pump maintains a pressure of at least 20 psi on
the main oil gallery. When pressure exceeds 30 psi, a relief
valve in pump opens and oil is bypassed from pressure side
to the inlet side of pump. An inlet screen, attached to the oil
pump inlet pipe, is immersed in the oil in sump, to screen dirt
and other foreign objects from being circulated through the
Figure 5-38. Typical cylinder block prepared for pressure
system.
test.
b. Removal.
(1) Disconnect power generator (para 5-29).
(b) Also, make two covers for the two water
(2) Drain the lubricating system (LO 55-1925-204-
holes (for water pump inlet) on blower side of block (fig. 5-38).
12-5).
Drill and tap one cover for an air line.
(3) Hoist the engine, carefully, to disengage dowel
(c) Use water seal rings in counterbores of
pins on power generator connecting flange. Hoist high
water holes on cylinder head, position plates over studs and
enough to give working room to remove the oil pan.
seal rings. Position main bearing caps on studs and secure
(4) Remove capscrews and lockwashers securing
with cylinder head holddown nuts. Tighten nuts enough to
the oil pan to the cylinder block, remove the pan, then remove
draw down plates to compress seal rings.
the gasket.
(5) Remove the capscrews and lockwashers
NOTE
securing the oil pump, regulator body and oil outlet tube and
Before installing the last plate, fill water
oil inlet tube from bearing caps and the cylinder block. Tag
jacket with a mixture of water and one
and save any mounting shims for reinstallation in same
gallon of permanent type antifreeze, then
position from which removed.
install and tighten the last plate.
5-45
|
||
|
||


