
| Tweet |

Custom Search
|
|

|
||
 threads of nipple with white lead, then install new relief valve
(3) Boiler repairs. Inspect, and repair by replacing
by turning it clockwise until tight.
the following items when defective:
(b) Inspect the observation doors for
(a) Inspect the safety relief valve operation
breaks, tears, or other defect. Remove and replace a
by moving the lever out away from valve body while the boiler
defective door.
is at work. If steam does not escape, shutdown the boiler,
b. Burner and ignition.
vent all steam and replace the defective safety relief valve by
turning it counterclockwise until it is free of the nipple. Fill
(1) Removal.
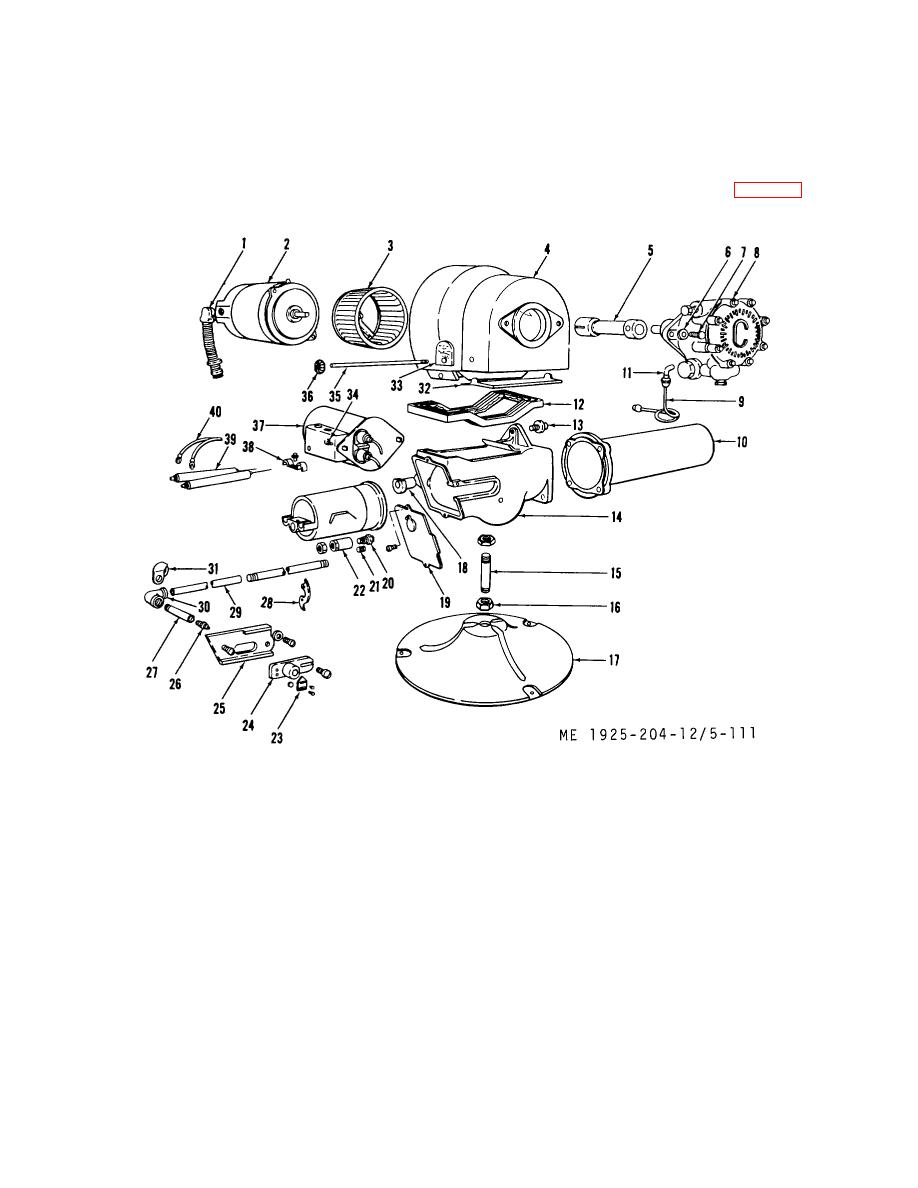
(a) Remove cover (19, fig. 5-111).
Figure 5-111. Oil burner assembly
1.
Conduit
11.
Elbow
22.
Adaptor
33.
Dial
2.
Motor
12.
Gasket
23.
Indicator
34.
Screw
3.
Fan
13.
Front bushing
24.
Bracket
35.
Rod
4.
Upper housing
14.
Lower housing
25.
Plate
36.
Knob
5.
Coupling
15.
Base nipple
26.
Connector
37.
6.
Lockwasher
16.
Locknut
27.
Nipple
ignition
7.
Capscrew
17.
Base
28.
Support
38. Clamp
8.
Fuel pump
18.
Rear bushing
29.
Tube
39. Electrode
9.
Tube
19.
Cover
30.
Elbow
40. Cable
10.
20.
Oil burner nozzle
31.
Insulating elbow
manifold
21.
Strainer
32.
Shutter
(b) Disconnect electrical connections in cable (40)
(d) Loosen setscrews remove thumbscrew and
from electrodes (39).
slip adjusting bracket from fuel connection.
(c) Disconnect fuel line connector (26) at slide
(e) Remove screws, and lift off cover plate (25).
adjustment bracket (24).
5-153
|
||
|
||


