
| Tweet |

Custom Search
|
|

|
||
 TM 5-1940-277-20
TM 1940-20/2
3.
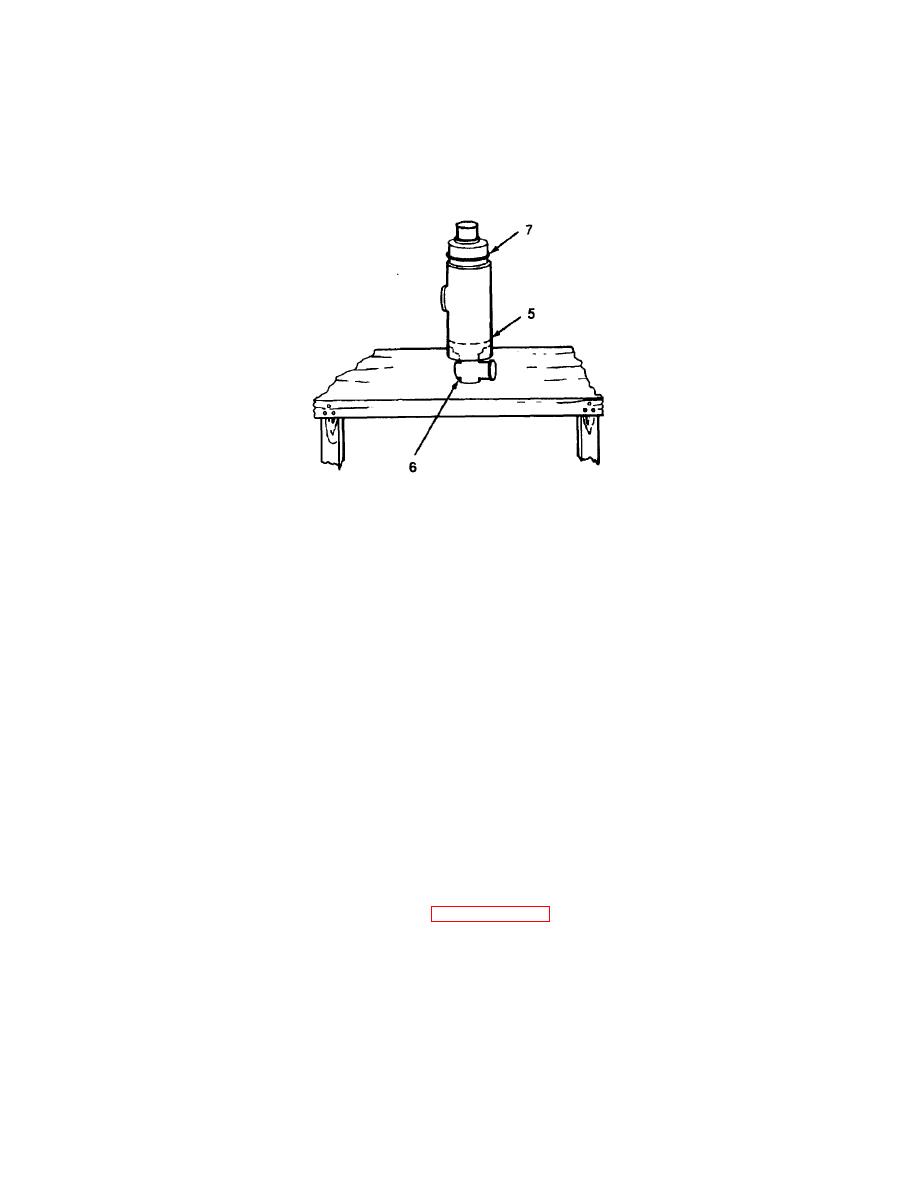
Standing oil cooler housing (5) upright, carefully tap L-shaped end of tube stack (6) into housing to
fully expose O-ring (7) at opposite end.
4.
Remove O-ring (7) from exposed end of tube stack (6) and discard.
5.
Carefully tap straight end of tube stack (6) into housing to fully expose O-ring (7) at opposite
(L-shaped) end of tube stack (6).
6.
Remove O-ring (7) from L-shaped end of tube stack (6) and discard.
NOTE
To replace O-rings (7) only, follow same procedure. Retain
and reinstall tube stack (6).
7.
Carefully slide tube stack (6) out of tube stack housing.
8.
Check tube stack (6) for signs of cracks and mixture of oil and water.
9.
Clean inside of oil cooler housing (5).
10.
Coat O-ring (7) with engine oil and install on L-shaped end of replacement tube stack (6).
11.
Slide replacement tube stack (6) through housing (5) beginning at non-filter end far enough to
expose O-ring groove at opposite end.
12.
Coat new O-ring (7) with engine oil and install on tube stack (6).
13.
Align grooves on tube stack (6) into housing (5).
14.
Carefully tap tube stack (6) into housing (5).
15.
Reinstall washer (4), lockwasher (3) and screws (2) at eah end of oil cooler using screwdriver.
16.
Install oil filter (1) on oil cooler (5). Hand tighten only.
17.
Replace engine oil cooler assembly (refer to paragraph 3-73).
3-163
|
||
|
||


