| Tweet |

Custom Search
|
|

|
||
 TM 55-1905-223-24-5
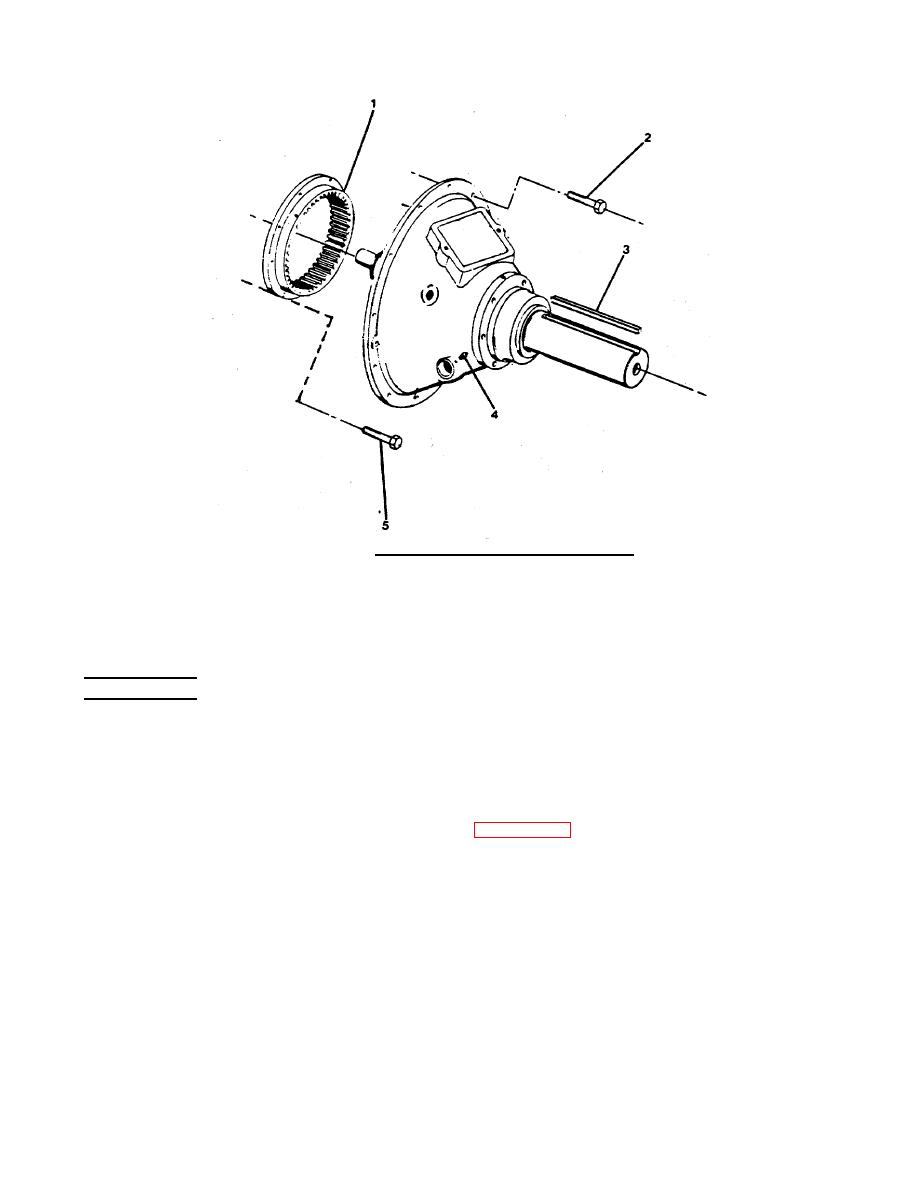
FIGURE 3-54. Power Takeoff Assembly (SL-111 HP2 ).
c.
Remove the eight hex-head capscrews (5) that secure the driving ring (1) to the PTO
adapter. Remove the driving ring (1).
d.
Support the clutch housing on a work bench with wooden blocks. Have the clutch end facing
upward.
DISASSEMBLY
NOTE
On PTO units which have been disassembled, steps (a) through (i) of the Assembly
Procedures must be accomplished in order to reach a starting point for bearing adjustment.
For field adjustment of bearing only, go to assembly step (i) of this procedure.
a.
Support the power take-off housing (44, FIGURE 3-55) on a work bench with wooden blocks.
Have the PTO end facing upward.
b.
Remove the pilot bearing (1) from the clutch shaft (34).
c.
Remove the jam nut (26) and lockwasher (25) from the hose fitting (23) located in the PTO
housing (44). Push the fitting (23) and hose (24) into the PTO housing (44).
d.
Straighten the bent portion of the hub nut lockwasher (3) from the hub nut (2). Remove the
hub nut (2) and the lockwasher (3) from the clutch shaft (34). Discard the hub nut lockwasher
(3).
3-79
|
||
 |
||