
| Tweet |

Custom Search
|
|

|
||
 TM 5-1940-277-20
TM 1940-20/2
TOOLS: 13 mm Box Wrench
2 Each 3/4 inch Open End Wrench
Flat Tip Screwdriver, 4 inch
10 mm Open End Wrench
5/16 inch Open End Wrench
PARTS/MATERIALS: Control Head Assembly
PERSONNEL REWIRED: Two
REMOVE:
Set master switch to "OFF". Shock or burns to personnel may result
NOTE
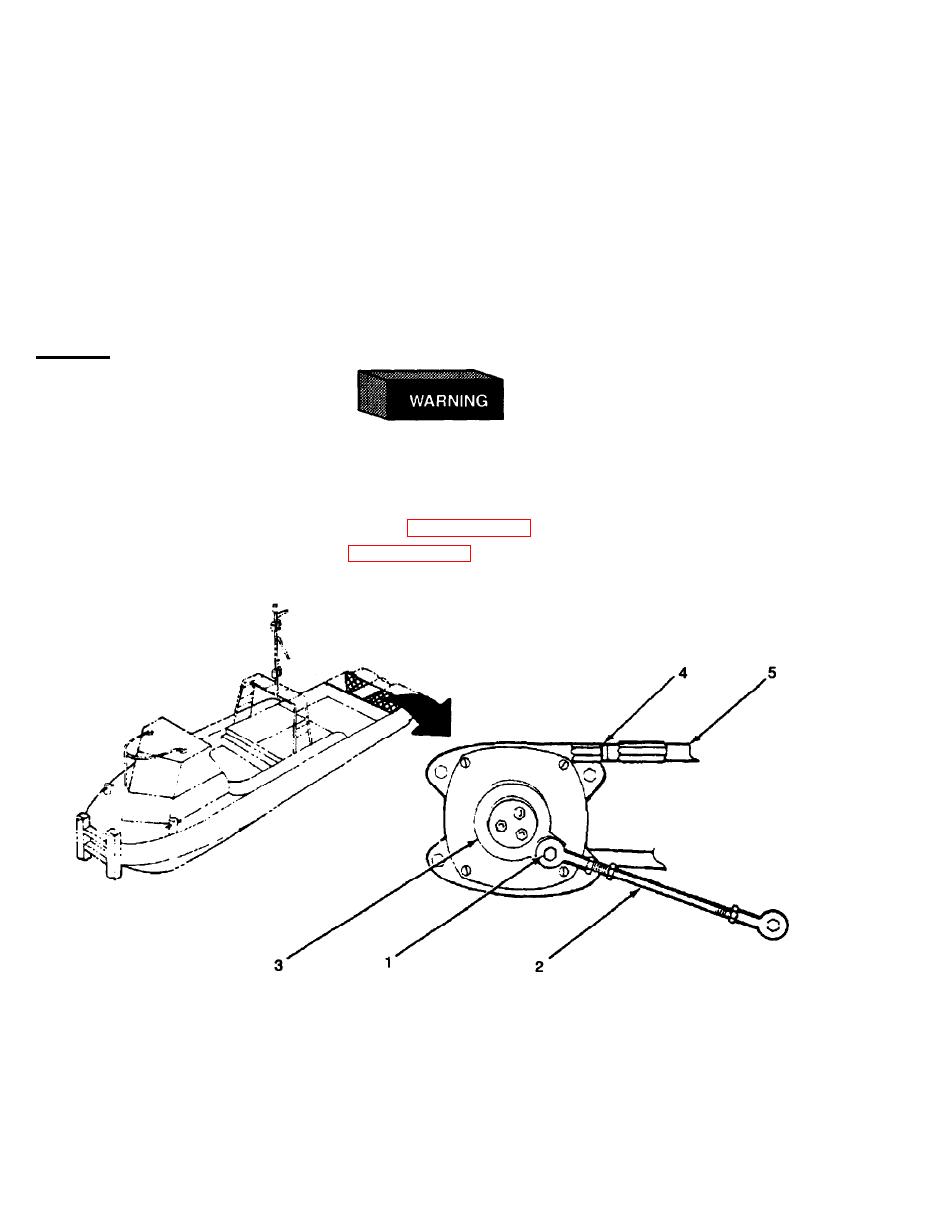
To adjust the scoop control cables, it is necessary to free the cables at their rotary control
assemblies. These are located aft, directly inboard of the scoops.
Open access panel under control console (refer to paragraph 3-154).
1.
Open and secure hydrojet hatch (refer to paragraph 3-154).
2.
Using 13 mm box wrench remove self-locking nut (1) securing rotary control rod (2).
3.
Slide control rod (2) off drank (3).
4.
Using 3/4 inch open end wrench remove split coupling (4) securing cable (5) to rotary control.
5.
Turn drank (3) clockwise until end of cable is free.
6.
|
||
|
||


