
| Tweet |

Custom Search
|
|

|
||
 TM 5-1940-277-20
TM 1940-20/2
2.
Using 13 mm wrench remove two nuts (5), washers (4), screws (1), and cable clamp (2) securing
engine stop cable (10) to bracket (3).
3.
Remove cotter pin (6), washer (7), and cable end (9) from stop control (8).
4.
Remove cable end (9) from stop control cable (10).
17
16
15
14
13
12
~
11
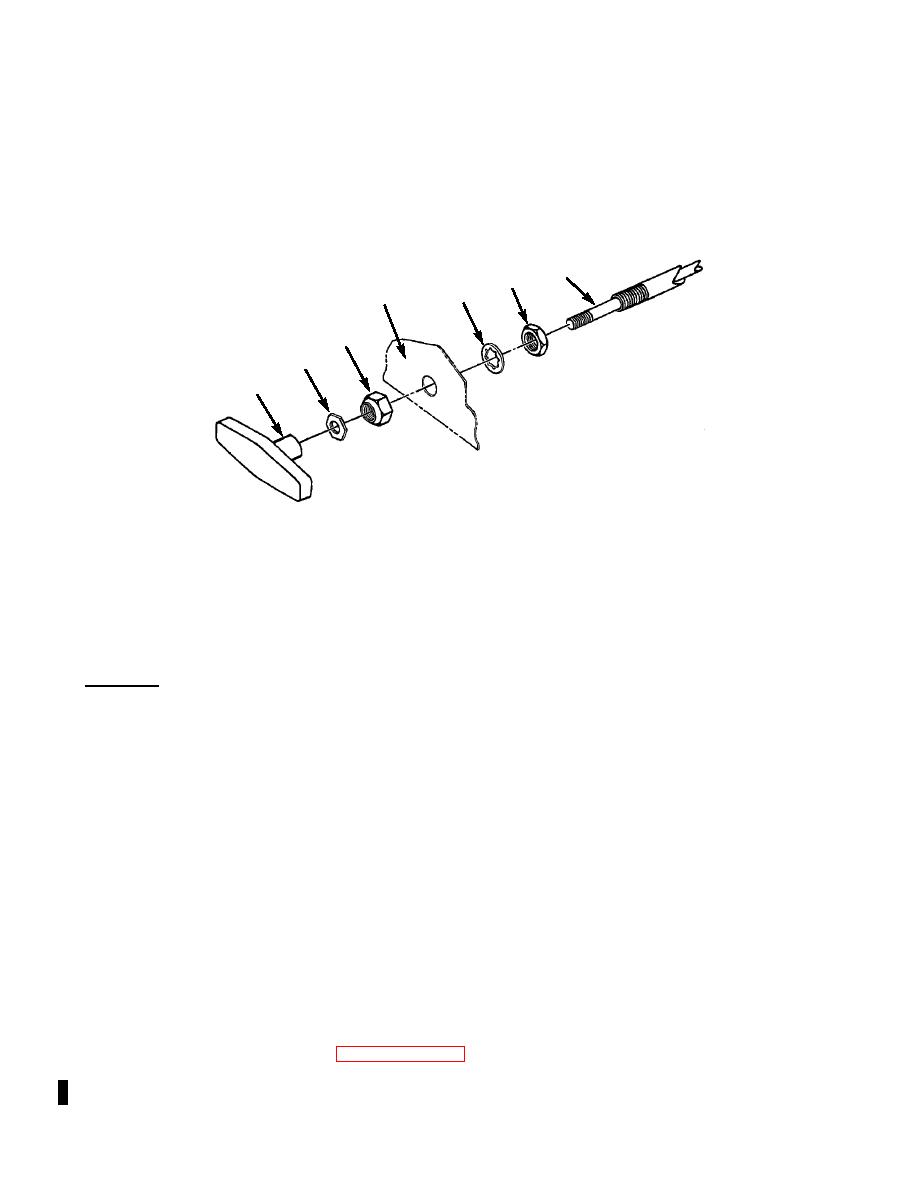
5.
Using 11 mm open end wrench, hold small retainer nut (12) and unscrew engine stop control
handle (11) at console (14)
6.
Using 11 mm open end wrench remove small retainer nut (12) from cable end (17).
7.
Using two 9/16 inch open end wrenches remove outer retaining nut (13) from cable end (17).
8.
Push cable end (17) through console (14).
9.
Using 9/16 inch open end wrench remove nut (16) and washer (15) from cable end (17).
INSTALL:
1.
Butt ends of old cable and new cable at injection pump. Wire cable ends together securely using 18
gage wire.
2.
Pull new cable (17) into position at console (14).
3.
Remove old cable from new cable.
4.
Using 9/16 inch open end wrench reinstall retaining nut (16) and inner washer (15) to cable end (17).
5.
Push cable end (17) through console (14) as far as inner retaining nut (16) will allow.
6.
Using two 9/16 inch open end wrenches install outer retaining nut (13) on cable end (17).
7.
Using 11 mm open end wrench install small retainer nut (12) on cable end (17).
8.
Screw on engine stop control handle (11) at console (14) while holding retainer nut (12) with 11 mm
wrench.
9.
Push engine stop control handle (11) fully against console (14).
10.
Install cable end (9) on stop control cable (10).
11.
Install cable end (9) on stop control (8) and secure with washer (7) and cotter pin (6).
12.
Using 13 mm wrench install screws (1), washers (4), cable clamp (2), and two nuts (5) securing
engine stop cable (10) to bracket (3).
13.
Close engine hatches (refer to paragraph 3-154).
Change 2
|
||
|
||


