
| Tweet |

Custom Search
|
|

|
||
 TM 55-1905-242-14
0063 00
REPLACE--LIGHTING FIXTURE, FLUORESCENT
REMOVAL
1.
Remove the bulbs as described in the Repair Lighting Fixture, Fluorescent procedure in this work package.
2.
Remove the fixture's internal panel (15) to expose the wiring connections.
3.
Set the multimeter to the Vdc (Volts direct current) setting and check for available voltage at the fixture's wiring connec-
tions. If no voltage is noted, proceed to the next step. If voltage is noted, ensure that the proper circuit breaker is
properly secured. Check both of the fixture's circuits (white and red) before proceeding.
4.
Label and disconnect the wiring (18) inside the fixture (16).
5.
Loosen the nut (17) that holds the wiring (18) and pull the wiring out of the fixture (16).
6.
Remove the bolts (19) that secure the fixture (16) to the overhead. Remove the fixture.
INSTALLATION
1.
Position the fixture (16) on the overhead and secure it with the bolts (19).
2.
Slide the wiring (18) into the fixture (16) and secure it with the nut (17).
3.
Connect the wiring (18) inside the fixture (16) using the labels from step 4 of Removal--Lighting Fixture, Fluorescent as
a guide and install the internal panel (15).
4.
Install the bulbs as described in the Repair Lighting Fixture, Fluorescent procedure in this work package.
5.
Remove the lockouts and tagouts and check the operation of the lights.
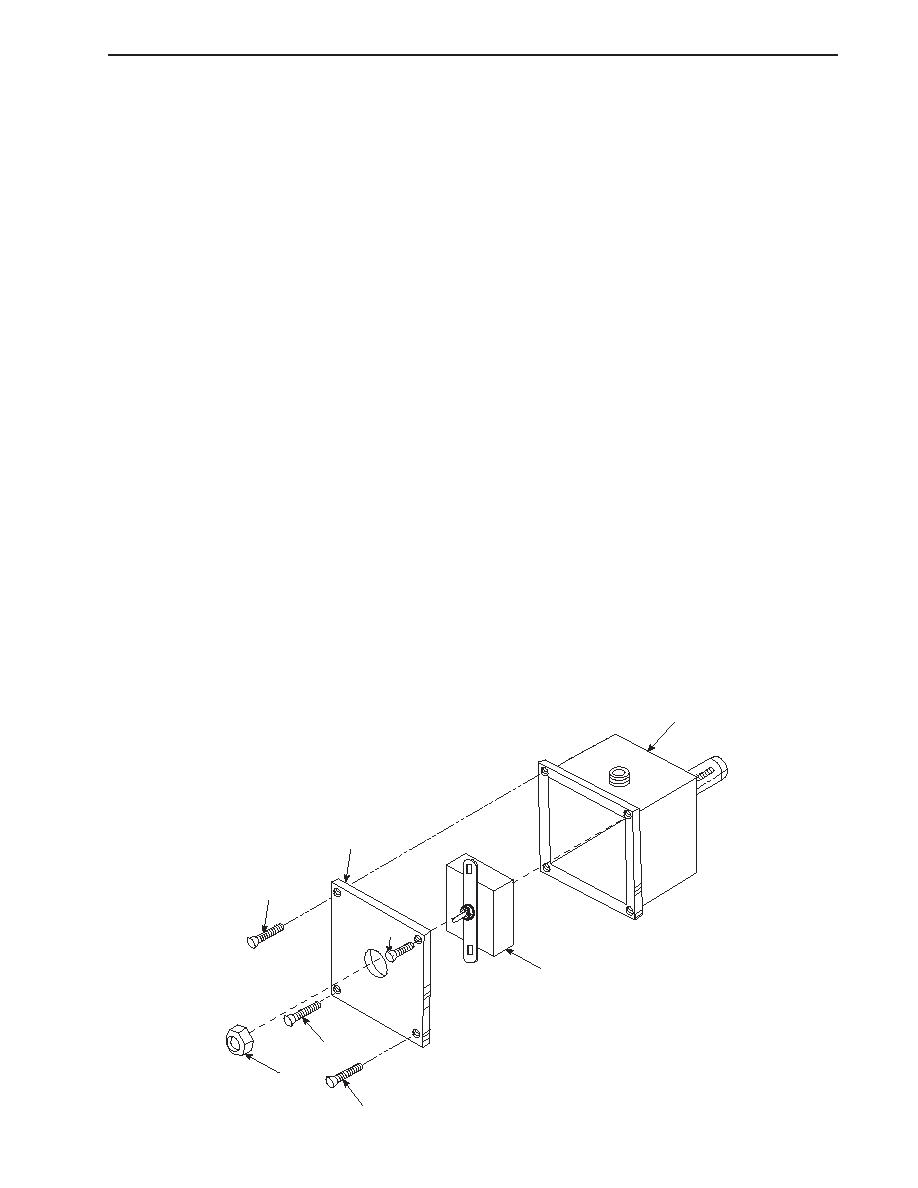
REPLACE--SWITCH
1.
Remove screws (20) that attach the switch plate (21) to the switch box (22).
22
21
20
20
23
20
24
20
0063 00-5
|
||
|
||


