
| Tweet |

Custom Search
|
|

|
||
 TM 55-1905-223-24-5
(c)
Use an arbor press to install the valve guide. Make sure the height of
the valve guide is 1.270 to 1.280 inch (32.26 to 32.51 mm) after it is
installed.
(d)
Use a new valve to check the inside diameter of the guide. Insert the
valve into the guide. The valve stem must move freely.
(e)
If the valve does not move freely in the guide, use the valve guide
reamer ST-646 to ream the guide.
(f)
Use a drill press that has a floating tool holder to ream the valve
guide. Install the reamer in the drill press.
(g)
Apply lubricating oil to the reamer while the guide is being reamed.
(h)
Do not ream the inside diameter of the guide larger than 0.4532 inch
(11.511 mm).
f.
Valves. Inspection, grinding and replacement.
(1)
Visually inspect the valves as follows:
(a)
Clean the valves and polish with fine crocus cloth.
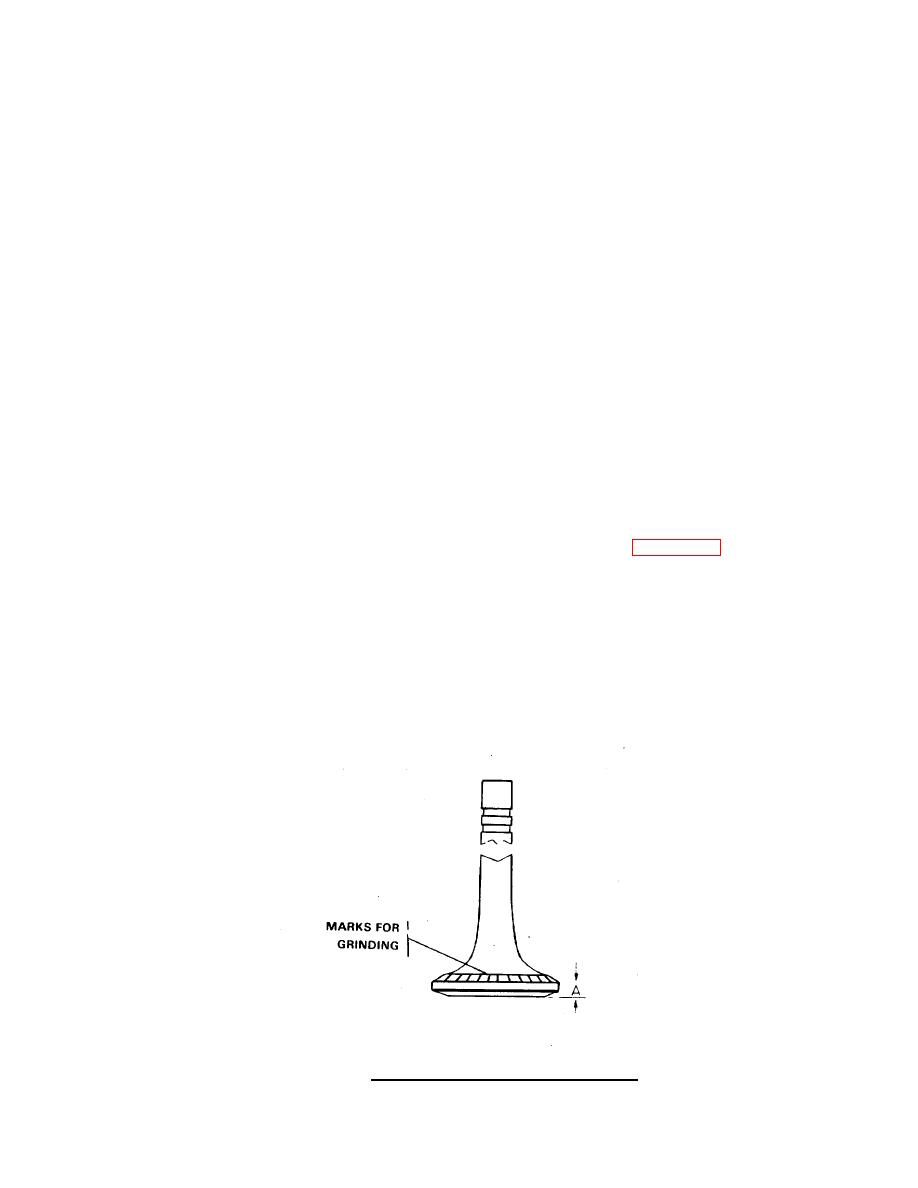
(b)
Check the valve head for damage. Use the valve head checking tool to
measure the thickness of the valve head rim (A), FIGURE 4-9. The rim
must measure a minimum of 0.105 inch (2.67 mm).
(c)
Measure the outside diameter of the valve stem. Discard the valve if
the stem is damaged or measures less than 0.449 inch (11.44 mm).
(d)
Check the grooves in the valve stem for wear. The valve spring collet
must fit tightly in the grooves. Discard the valve if the grooves are
worn enough that the collet is loose.
FIGURE 4-9. Rim Measurements and Grinding Marks.
4-17
|
||
|
||


