| Tweet |

Custom Search
|
|

|
||
 TM 55-1905-217-34
with compressed air, and lubricate the piston pin with clean engine oil.
(g) Install the piston rings on the piston.
f. Installation.
(1) Install connecting rods (12, fig. 3-72) and bearings (13), and bearing caps (14) on the crankshaft.
(2) Install oil pump (para 3-19).
(3) Install cylinder head (para 3-13).
3-21. Cylinder Liners
a. Removal. Remove a cylinder liner from the block as follows:
(1) Remove the piston and connecting rod assembly (para 3-20).
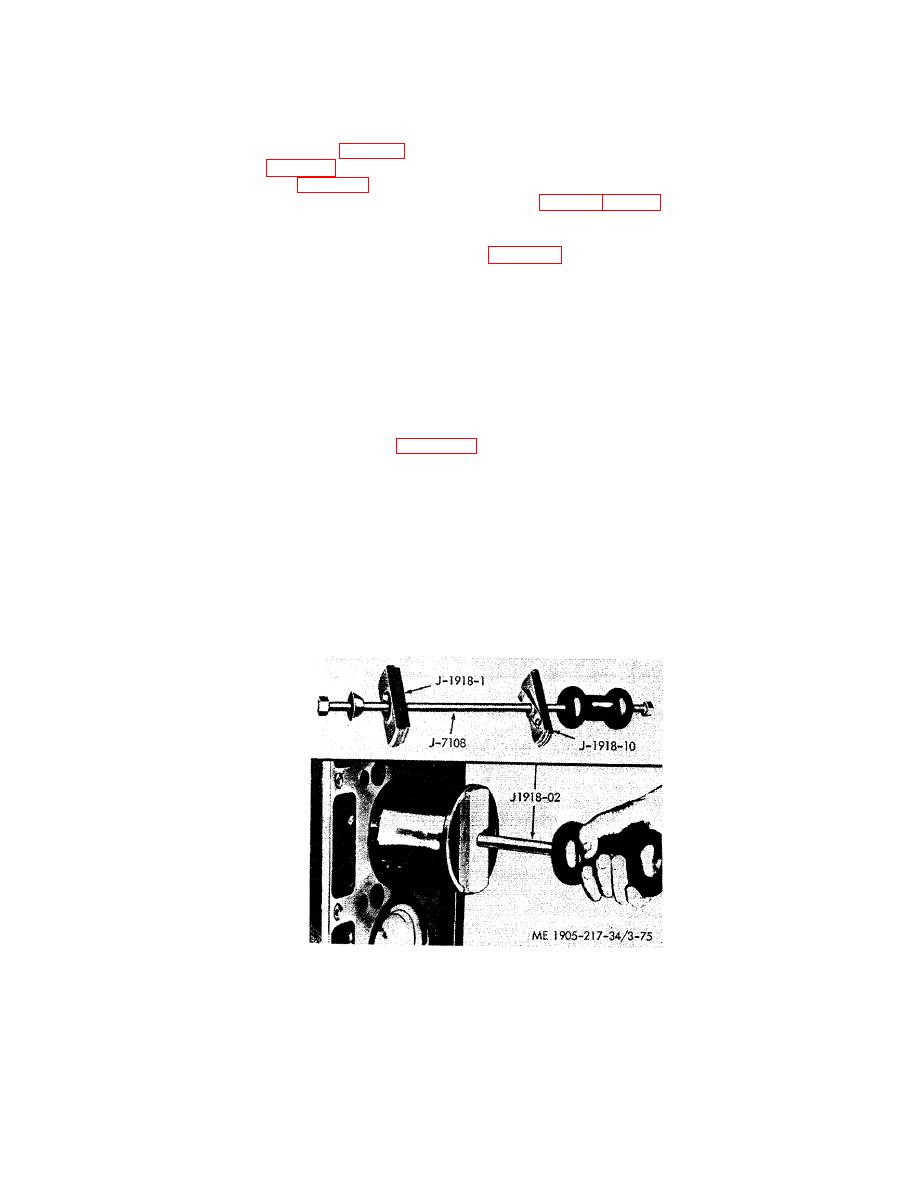
(2) Remove the liner with tool J 1918-02 as follows:
CAUTION
It is very important that the proper method is followed when removing a liner. Do
not attempt to push the liner out by inserting a bar in the liner ports and rotating the
crankshaft, otherwise the piston may be damaged or the upper ring groove may
collapse.
(a) Slip the lower puller clamp up on the puller rod and off the tapered seat. Cock the clamp so
it will slide down through the liner. The clamp will drop back on the tapered seat after it clears the bottom of the
liner. Then, slide the upper puller clamp down against the top edge of the liner.
(b) With the tool in place, strike the upset head on the upper end of the puller rod a sharp blow
with the puller weight, thus releasing the liner (figure 3-75).
(c) Remove the tool from the liner. Then, remove the liner from the block.
(d) Remove the liner insert from the counterbore in the block.
b. Cleaning. Clean the cylinder liners with cleaning solvent (FED. SPEC. PD-680), and dry thoroughly.
c. Inspection of Used Cylinder Liner.
(1) When the cylinder liner is removed from the cylinder block, it must be thoroughly cleaned and then
check for: cracks, scoring, poor contact on outer surface, flange irregularities, inside diameter, out-of-round and
taper.
(2) A cracked or excessively scored liner must be discarded. A slightly scored liner may be cleaned-up
and reused.
(3) Excessive liner-to-block clearance or block bore distortion will reduce heat transfer
Figure 3-75. Cylinder liners, removal
3-104
|
||
 |
||