| Tweet |

Custom Search
|
|

|
||
 TM 55-1905-223-24-1
CAUTION
All measurements must be performed with the block positioned on a flat surface. If
the block is installed on an engine stand, distortion will cause the measurements to
be wrong.
g.
Measure cylinder block.
CAUTION
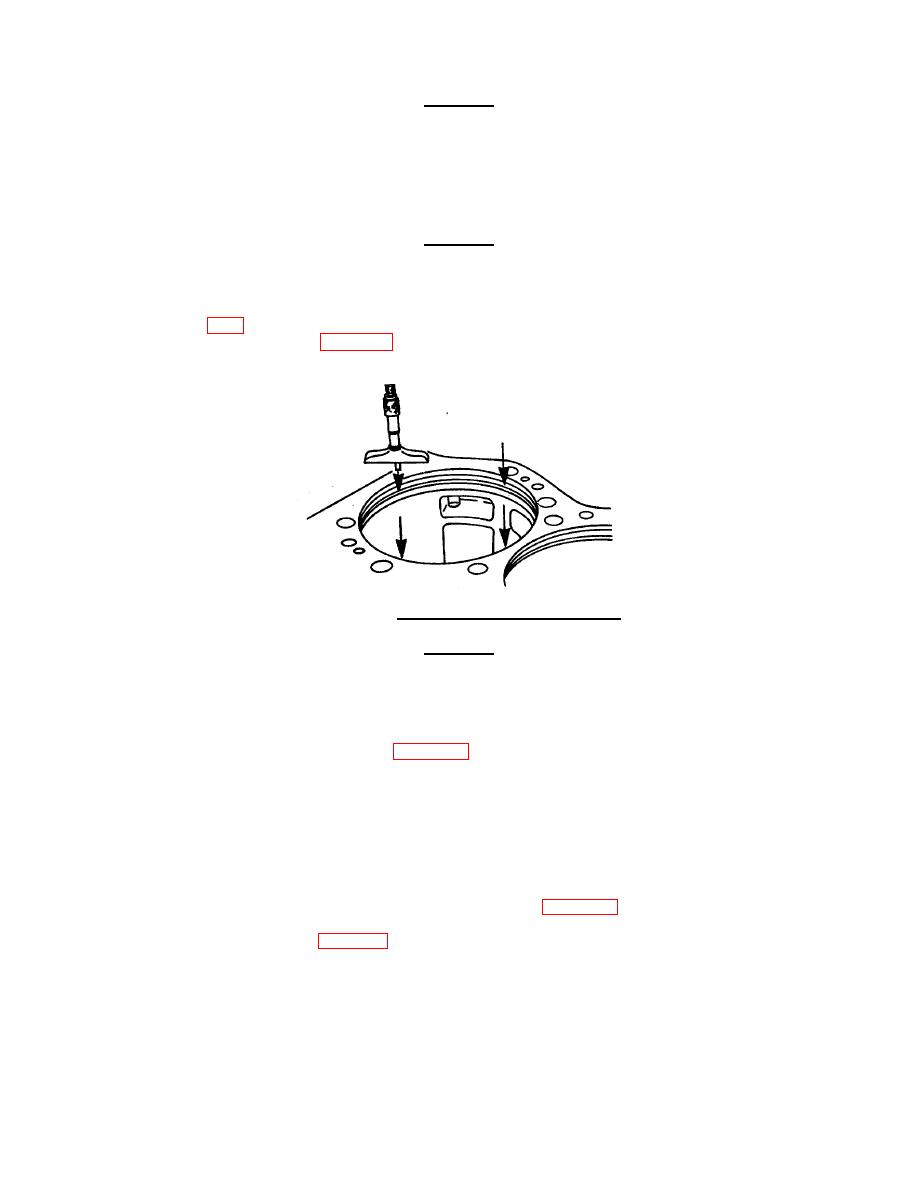
Ensure micrometer contacts flat surface of ledge. It must not touch the radius.
(1) Measure counterbore depth with a depth micrometer at the four locations shown in FIG.
specifications in Table 4-8 .
FIGURE 4-81. Counterbord Depth Measurement.
CAUTION
Ensure indicator does not contact counterbore radius on a block that does not have
a double undercut.
(2) Use gauge block to measure the angle of the counterbore ledge at 4 places on the
counterbore circumference (FIG. 4-82). Ensure measurement of ledge depth is as near
to counterbore radius as possible and as near to counterbore edge as possile. Verify that
b
the measurement near the counterbore edge is the same or no more than 0.0014 inch (0.036
mm) shorter than the measurement near the counterbore radius.
(3) Use crack detection kit to check the counterbore ledge for cracks. Circumferential cracks are
acceptable if they do not extend more than of the distance across the ledge. Cracks that
extend into a water hole or capscrew hole are not acceptable.
(4) Measure inside diameter of upper counterbore (1, FIG. 4-83). The point of measurement
must be within 0.100 inch (2.5 mm) from the top of the block. Verify measurement is within
specifications in Table 4-8 . Verify upper counterbore is round within 0.001 inch (0.025 mm).
4-91
|
||
 |
||