| Tweet |

Custom Search
|
|

|
||
 TM 55-1905-223-24-3
c.
Lift the generator into a position so that the mounting holes in the drive discs and the generator housing
adapter slide over the guide studs. Make sure that the generator and housing are correctly piloted to
the flywheel and flywheel housing.
NOTE
One of the rotor poles should be at the bottom centerline
position when installing the generator.
d. Pilot the generator into the flywheel and flywheel housing.
e. Install the capscrews (8, Figure 3-8) with hardened washers through the discs into the flywheel. Do
not use lockwashers. Do not tighten capscrews.
f.
Install capscrews (3, Figure 3-8) with lockwas ers through the generator housing adapter into the
h
flywheel housing. Do not tighten.
g. Remove the guide studs and install the remaining capscrews.
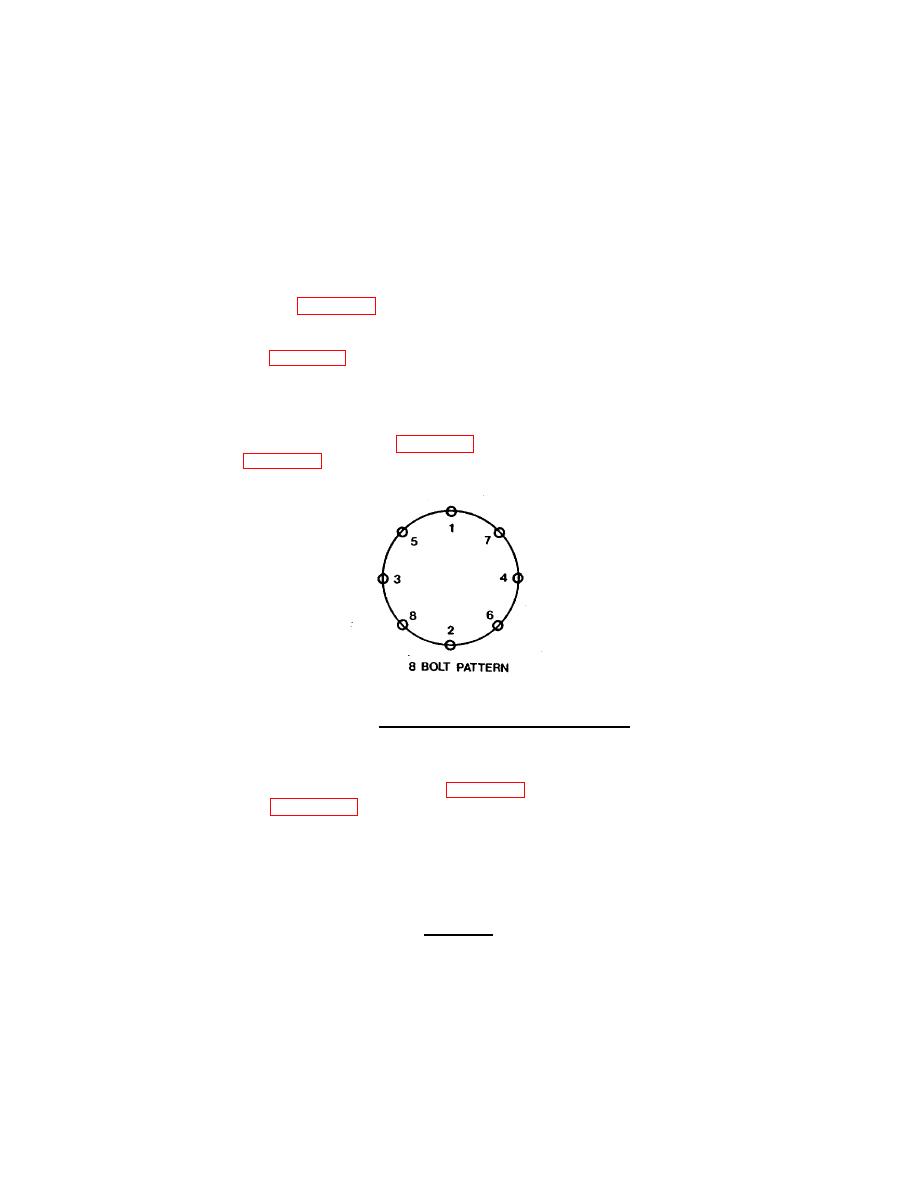
h. Tighten the eight housing capscrews (3, Figure 3-8) to 50 ft-lb (65 N ) torque. Tighten in the
m
sequence shown in Figure 3-9.
FIGURE 3-9. Generator Housing Torque Sequence.
i.
Tighten the six flywheel coupling capscrews (8, Figure 3-8) to 352 ft-lb (476 N ). Tighten in the
m
sequence shown in Figure 3-10.
j.
Align the generator feet on the subbase crossmember.
k.
Slowly remove the hoist tension on the generator.
CAUTION
Alignment of the generator is critical. If necessary, shims should
be placed under the generator to aid in alignment.
3-27
|
||
 |
||